
One of my favorite way of spending some free time is browsing Facebook groups dedicated to astrophotography, and I am active in quite a few of them.
In those groups, I often found amazing and inspiring photos of the most common deep sky targets. You all know them: the Pleiades, the North America and Pelican Nebulae, Andromeda, and the Great Orion Nebula, to name a few.
But the Cosmos is H-U-G-E and there are almost unlimited targets waiting for us to point our telescopes at them. The only reason you don’t know most of them is that they may be quite small and faint, thus challenging.
On the other hand, I think is safe to assume we are all in this hobby because of the challenges it offers, so having challenging targets is not that bad. Plus, is nice to have a goal, to know what you will be after once you have photographed all of the usual suspects.
Facebook groups are the best way to get to know what is out there and for this reason, I now scroll through my feed with trepidation, waiting to see something I didn’t know before and add another target to my collection.
So, how can you create your own target collection?
Step 1: Screenshot Facebook Posts
When I see a post about a new target or depicting a known one in a new way, I put the post full screen and take a screen shot of it.

The Ghost Nebula photographed by Tommaso Massimo Stella, a very talented Italian astrophotographer.
There are two reasons why I don’t just download the image from Facebook into a directory called “Targets” but I take a screenshot:
My intention is not to use that image in any way, let alone to post it around as mine;
I am more interested in the many details people posts about their target and about how they photographed it.
Step 2: Visualise The Target In Stellarium
Stellarium for desktop computers is a wonderful freeware planetarium, allowing you to discover the night sky, simulate the field of view can have with your gear, and much, much more.
After firing up Stellarium on my computer, I do the following:
I find the target of the Facebook post;
Use the keyboard shortcuts C, D, and A to display the constellations and deep sky objects, and to remove the effect of the atmosphere, respectively;
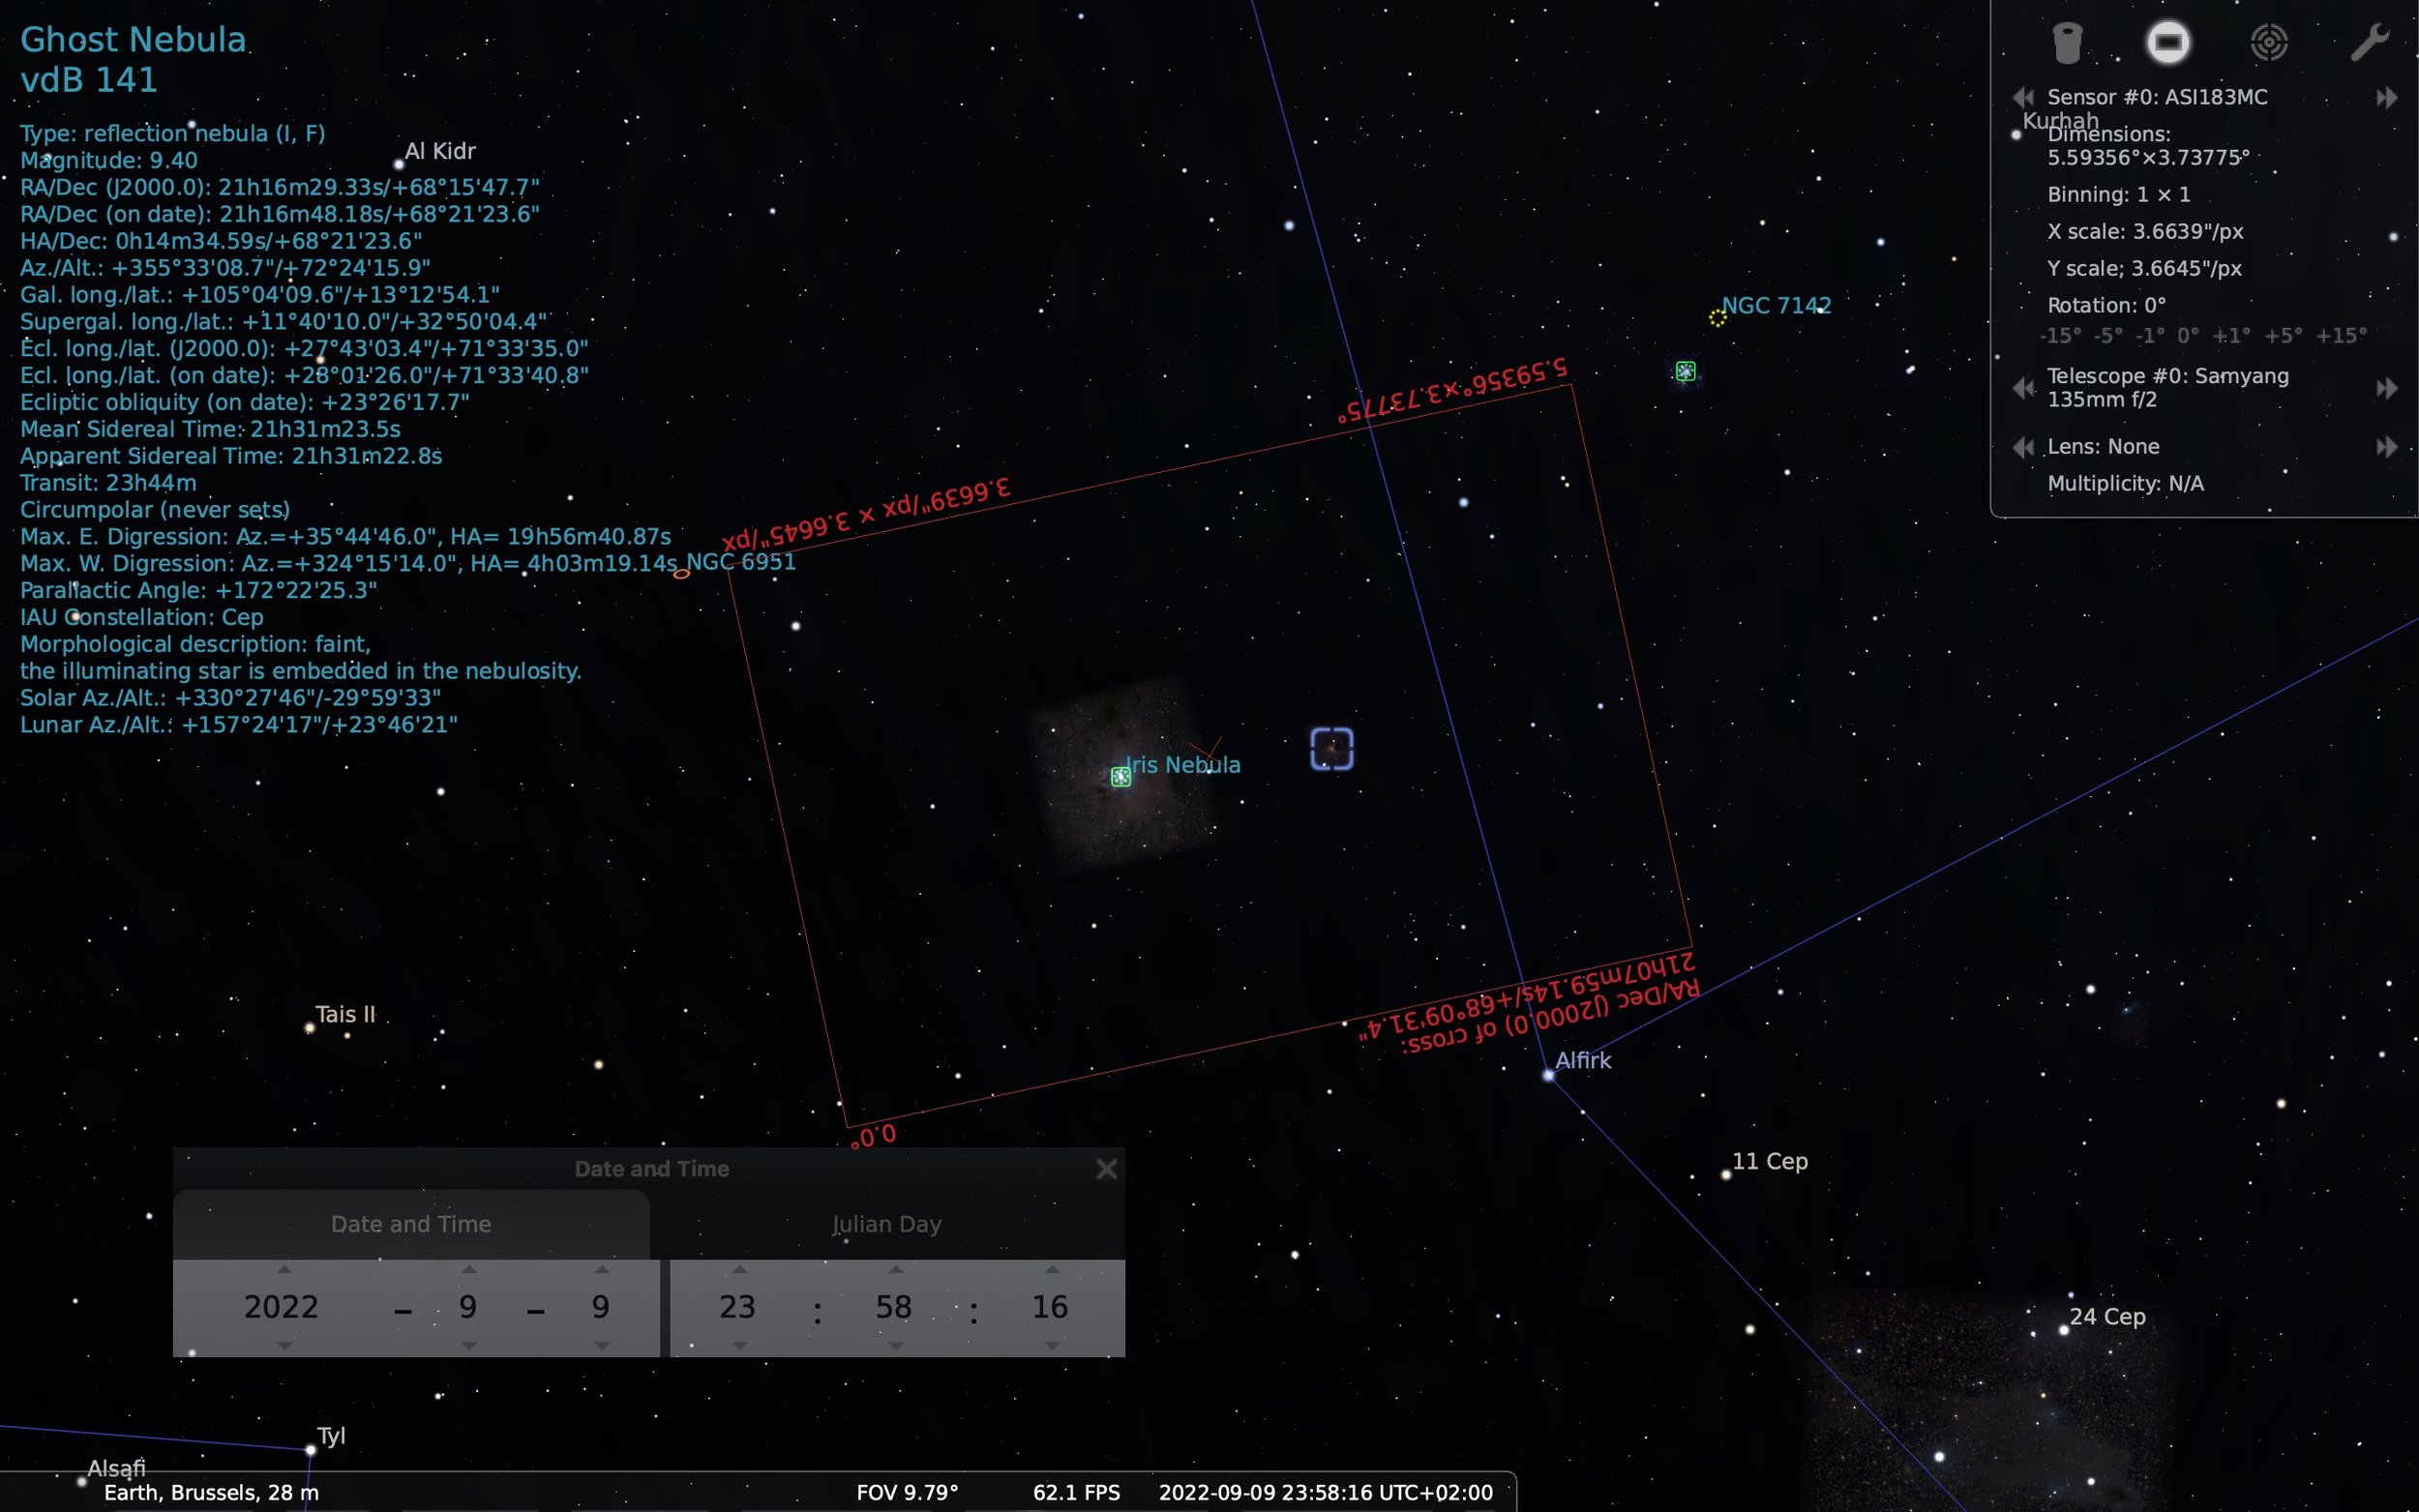
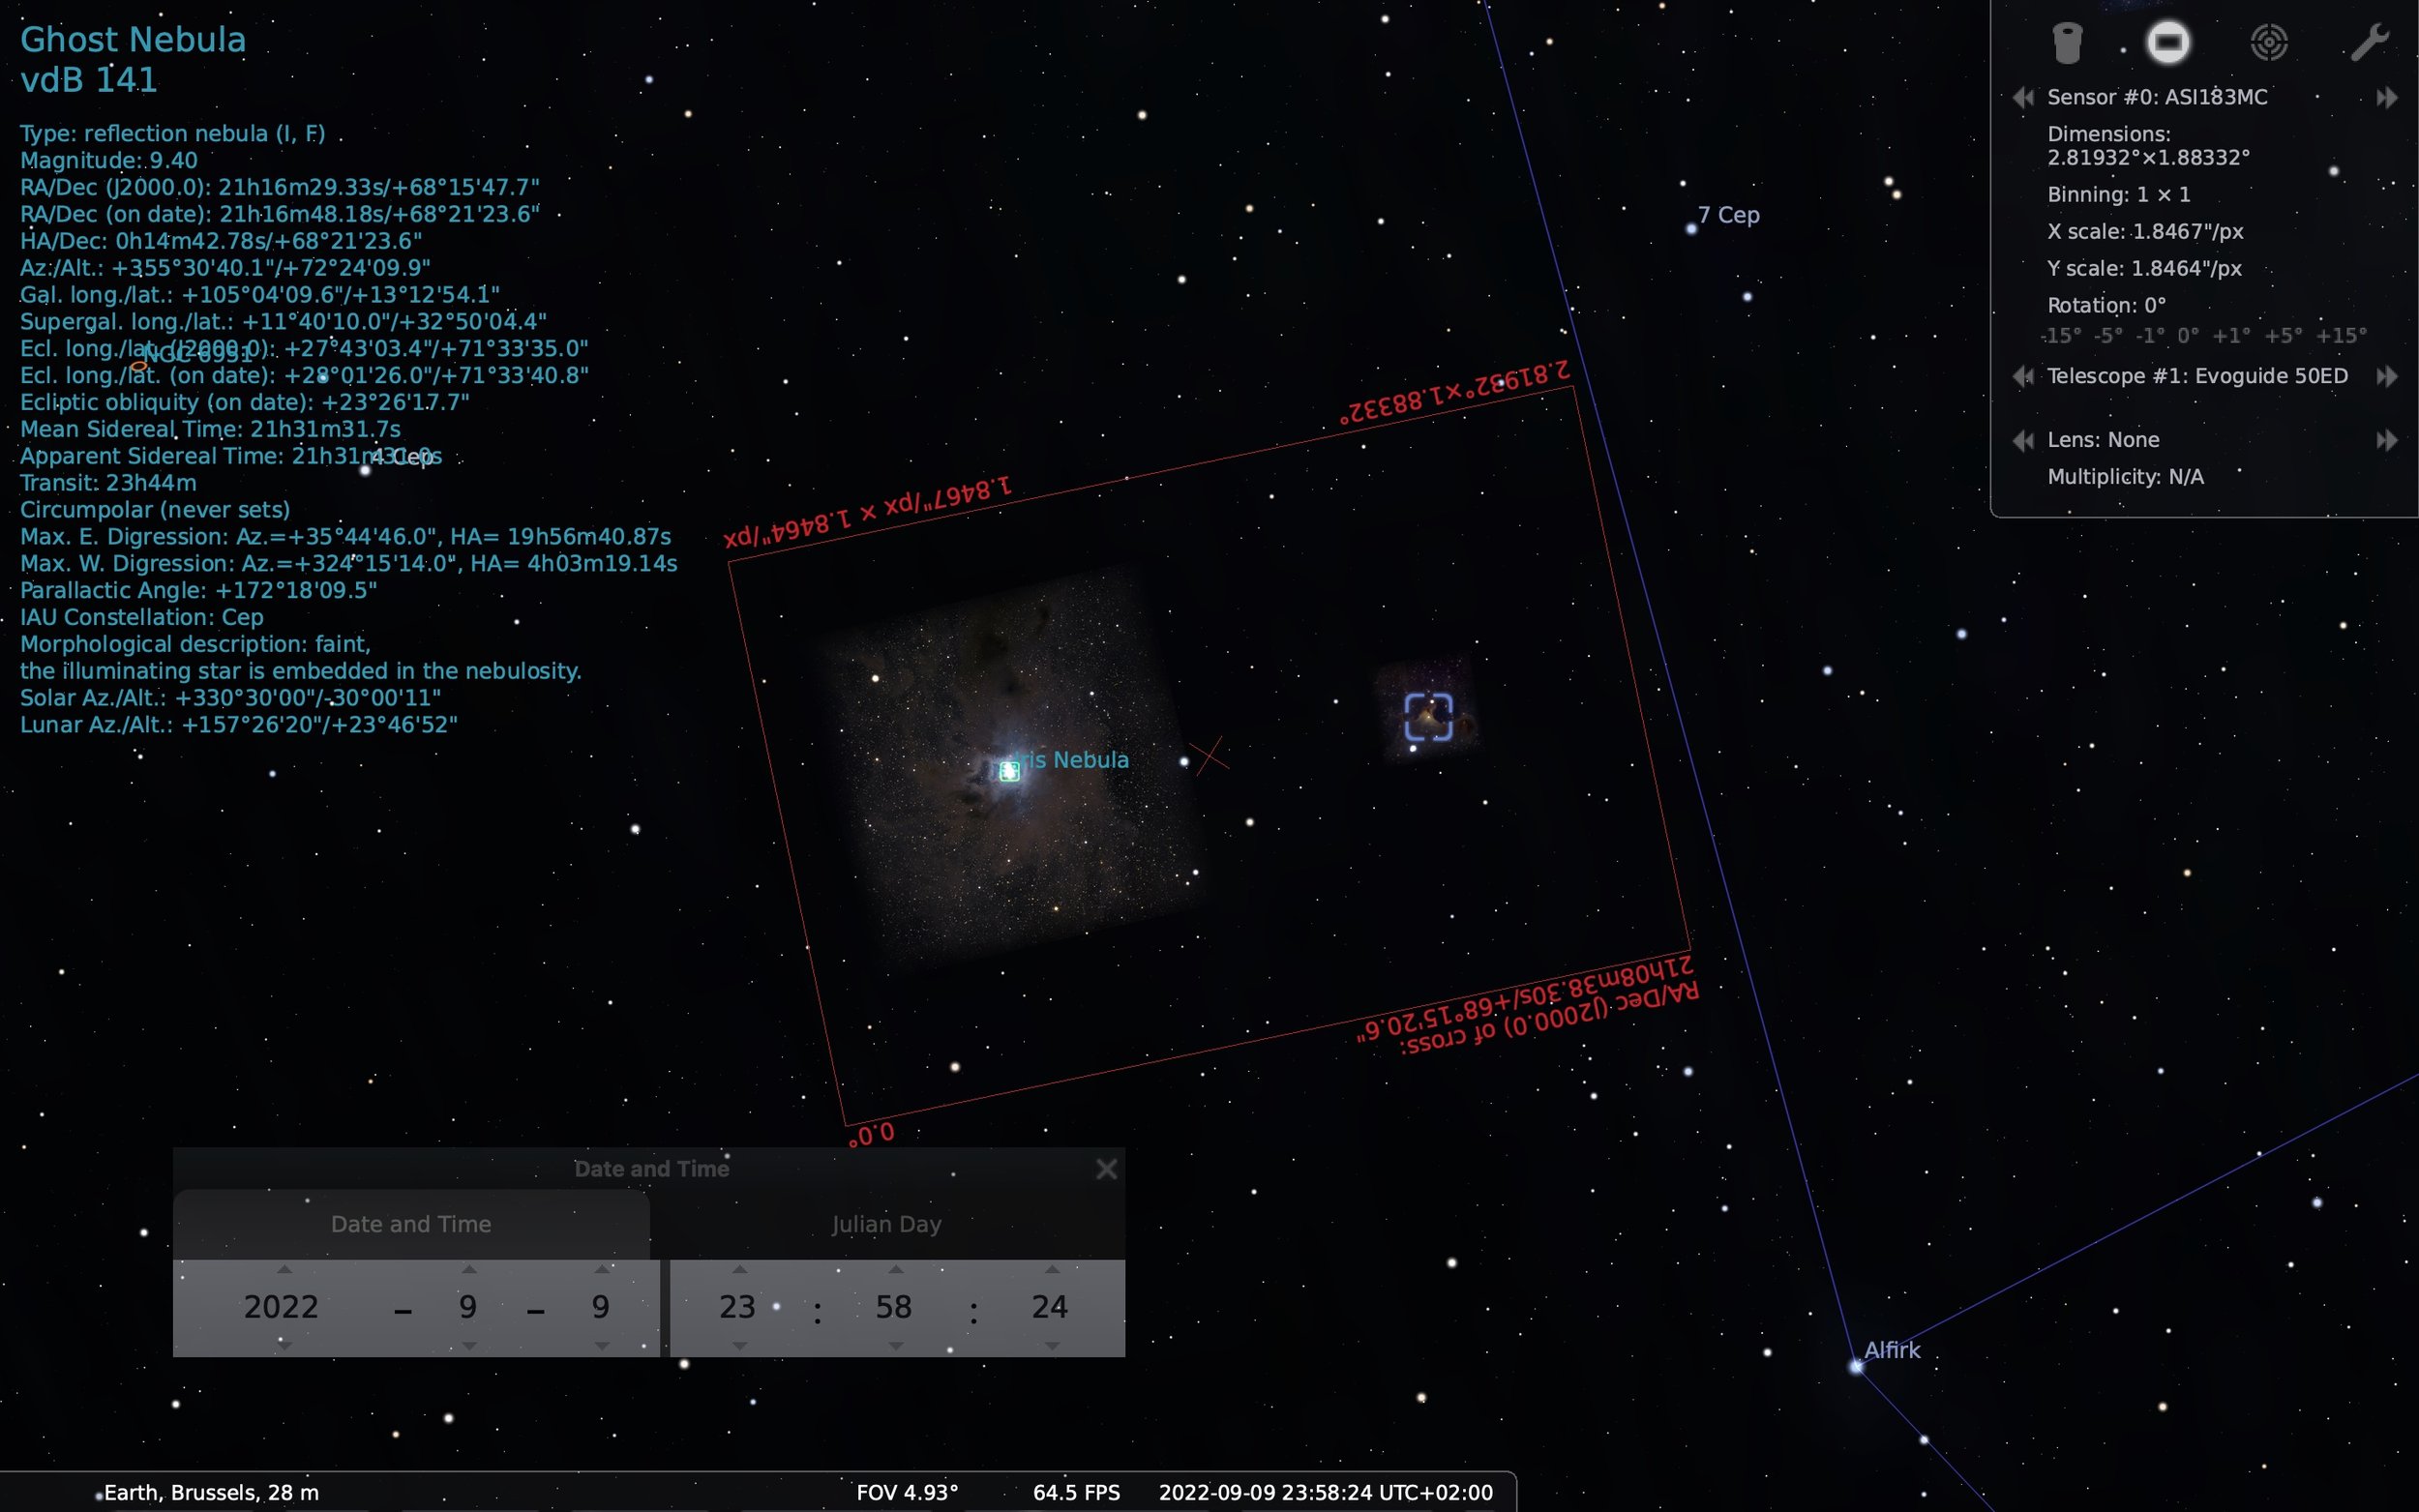
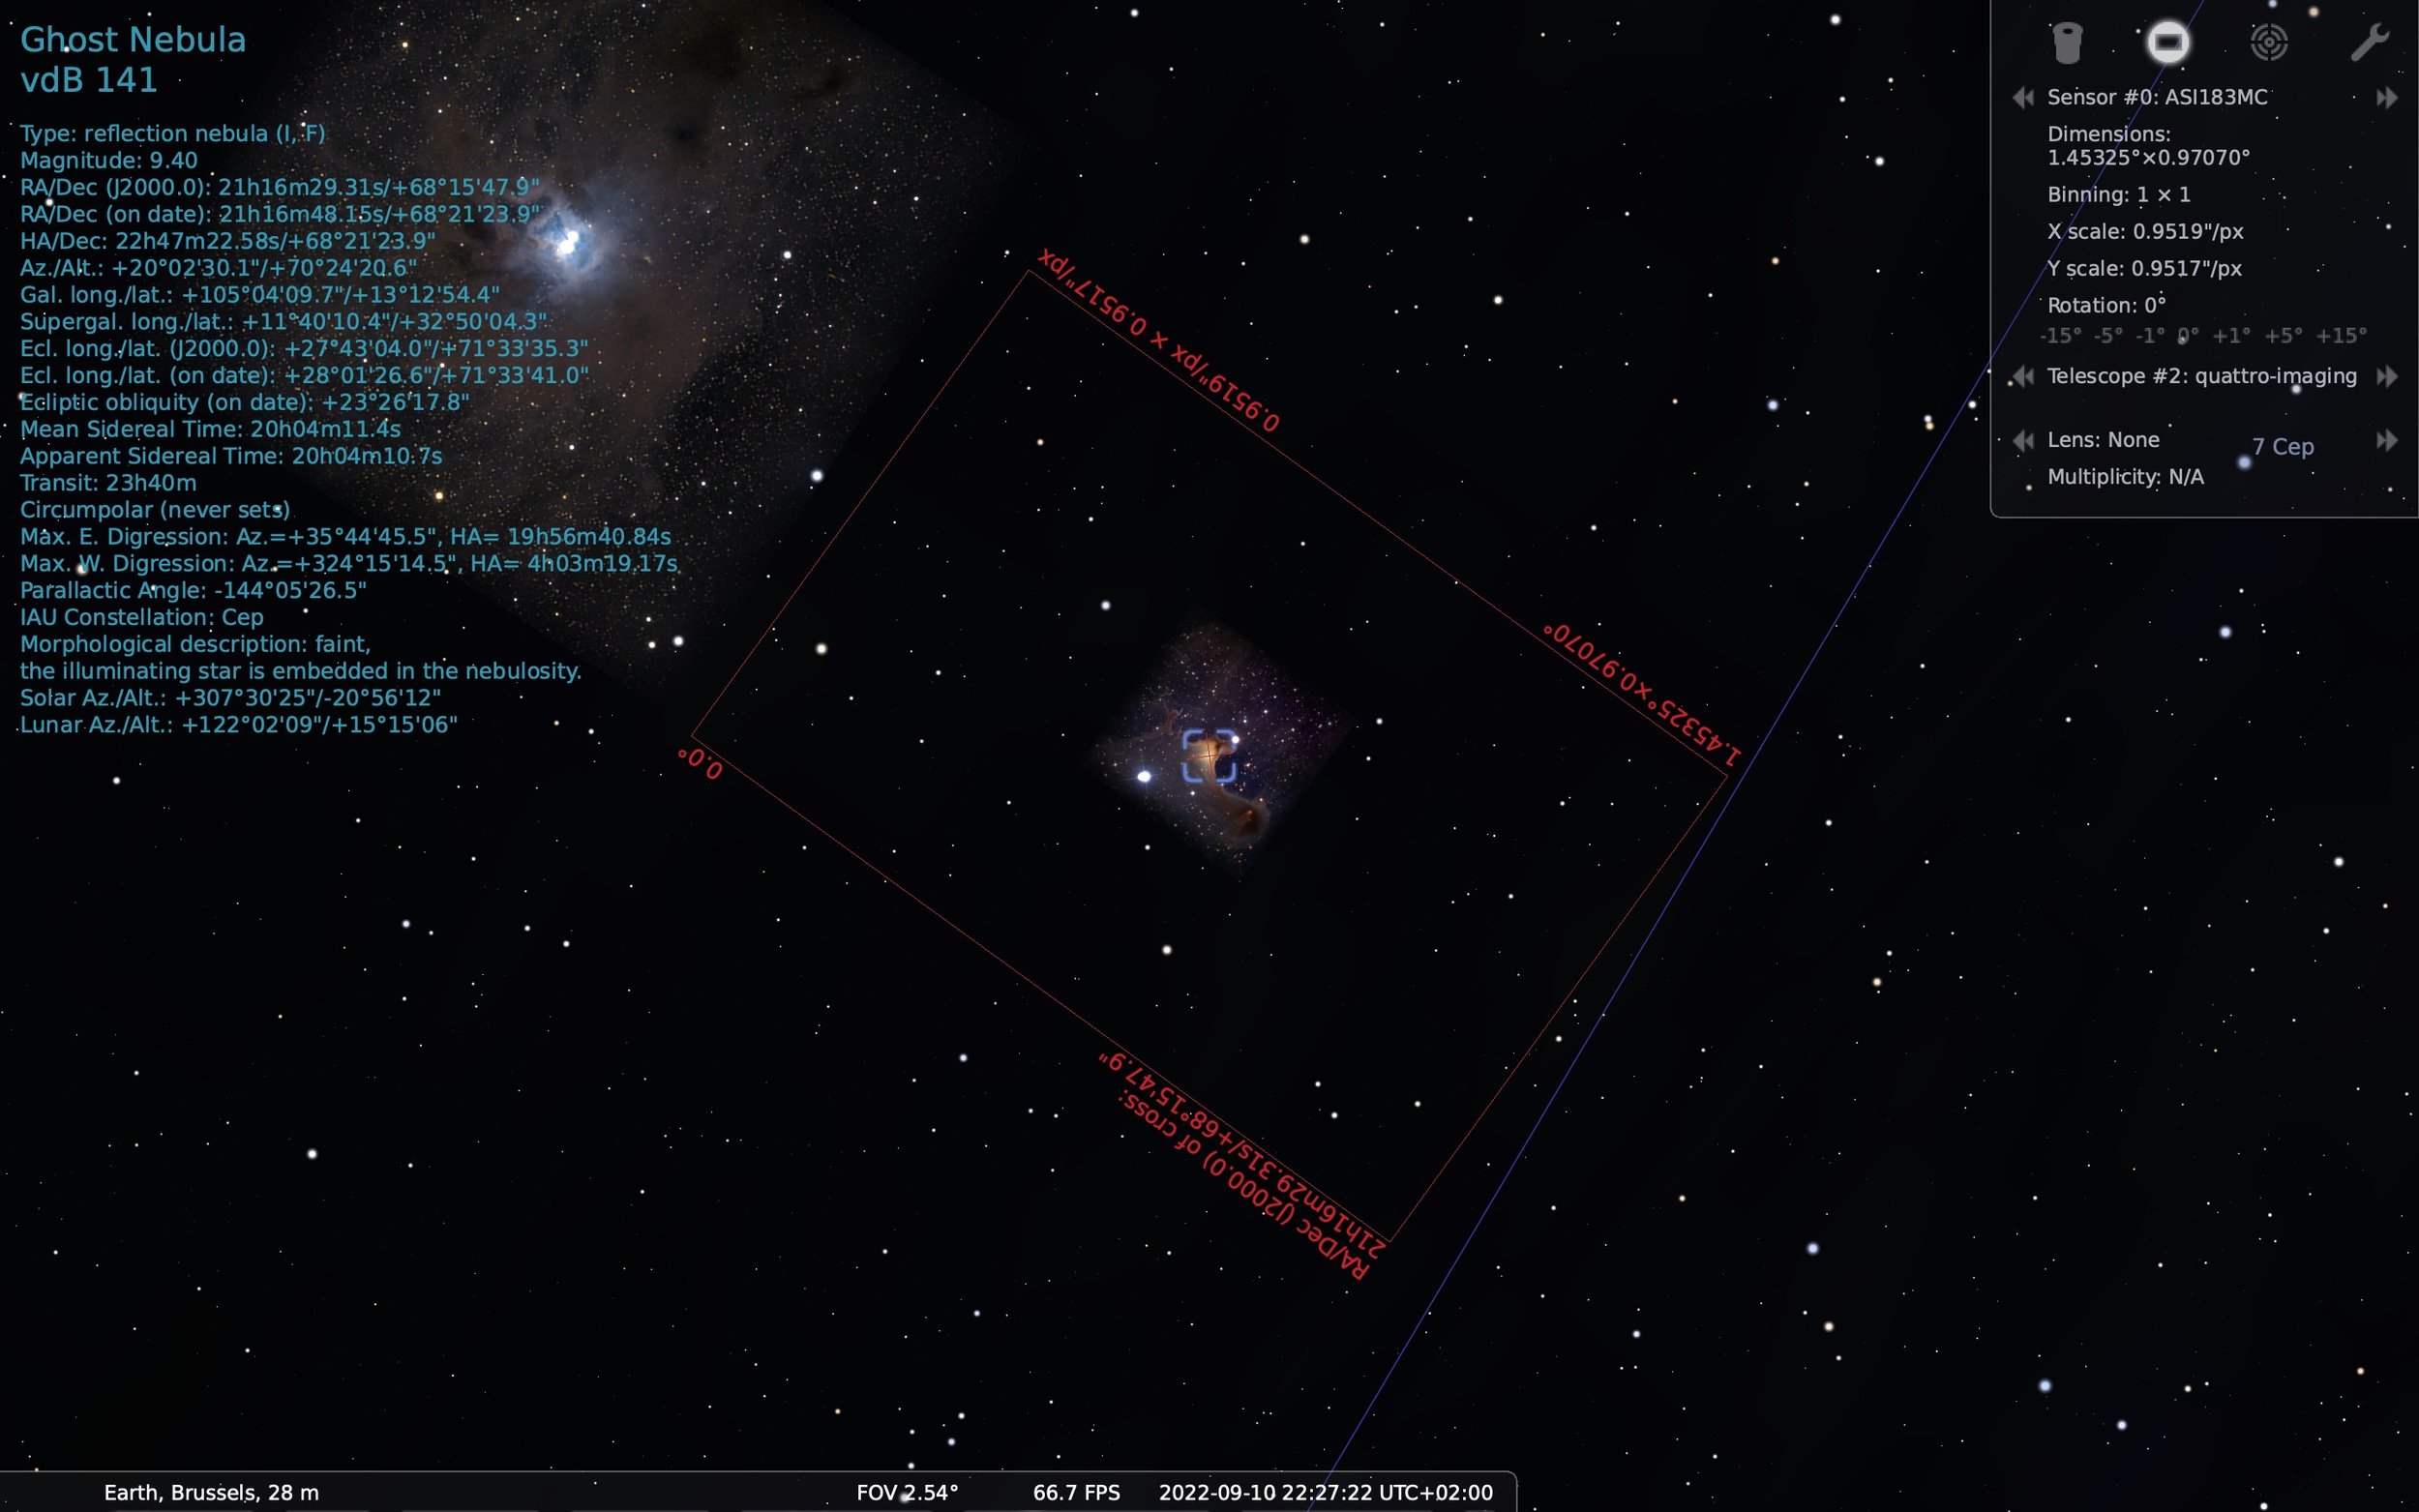
Simulate the field of view (FOV) with the different telescope-camera combinations I could use and take a screenshot of the most interesting FOVs.
Below the FOV for my ASI183mc camera paired with a Samyang 135 f/2 lens, the Sky-Watcher Evoguide 50 ED and my soon-to-come Sky-Watcher Quattro 150p.
Step 3: Tie All Together With Evernote
Evernote is one of the best (and older) note taker and note organizer software. What I love about it, is the ease of use and the possibility to use, and search for, tags.
I have created a notebook called DSO and I am in the process of to creating a note for each target I may be interested in.

My Evernote DSO notebook and the tags I use.
For each target, I note down the WHAT, WHERE, and WHEN, together with the suitable gear and the needed type of sky. Since the Ghost Nebula is a reflection nebula and narrow band filters have no use for it, I would exclude this target from the list of targets one could photograph from the city and leave it for much darker skies.
But all sorts of useful information can be added, such as the Surface Brightness, Contrast Index, Size, Apparent Magnitude, and so on. Many of these info are available directly from Stellarium.
Next, I add tags indicating the type of target, best season(s) to image it, suitable gear etc., so that I can easily find it under multiple criteria.
Conclusions
In no time you will create a large collection of interesting targets: Nebulae, Galaxies, Supernova Remnants, Clusters, and Asterisms. Similarly, you can also create collections of tips and techniques other people use as well.
Plus, you will learn a lot about your sky and you will never find yourself again wondering “What could I photograph tonight?”.