
For many of us astrophotographers on a budget and beginners, to buy a star tracker is the first step towards serious astrophotography.
Star trackers are the perfect machines for portable and wide-field astrophotography, but you’ll soon want to do more than that.
If you are wondering how to close-in on those galaxies and nebulae with your tracker, wonder no more and don’t let the infamous Gear Acquisition Syndrome gets you.
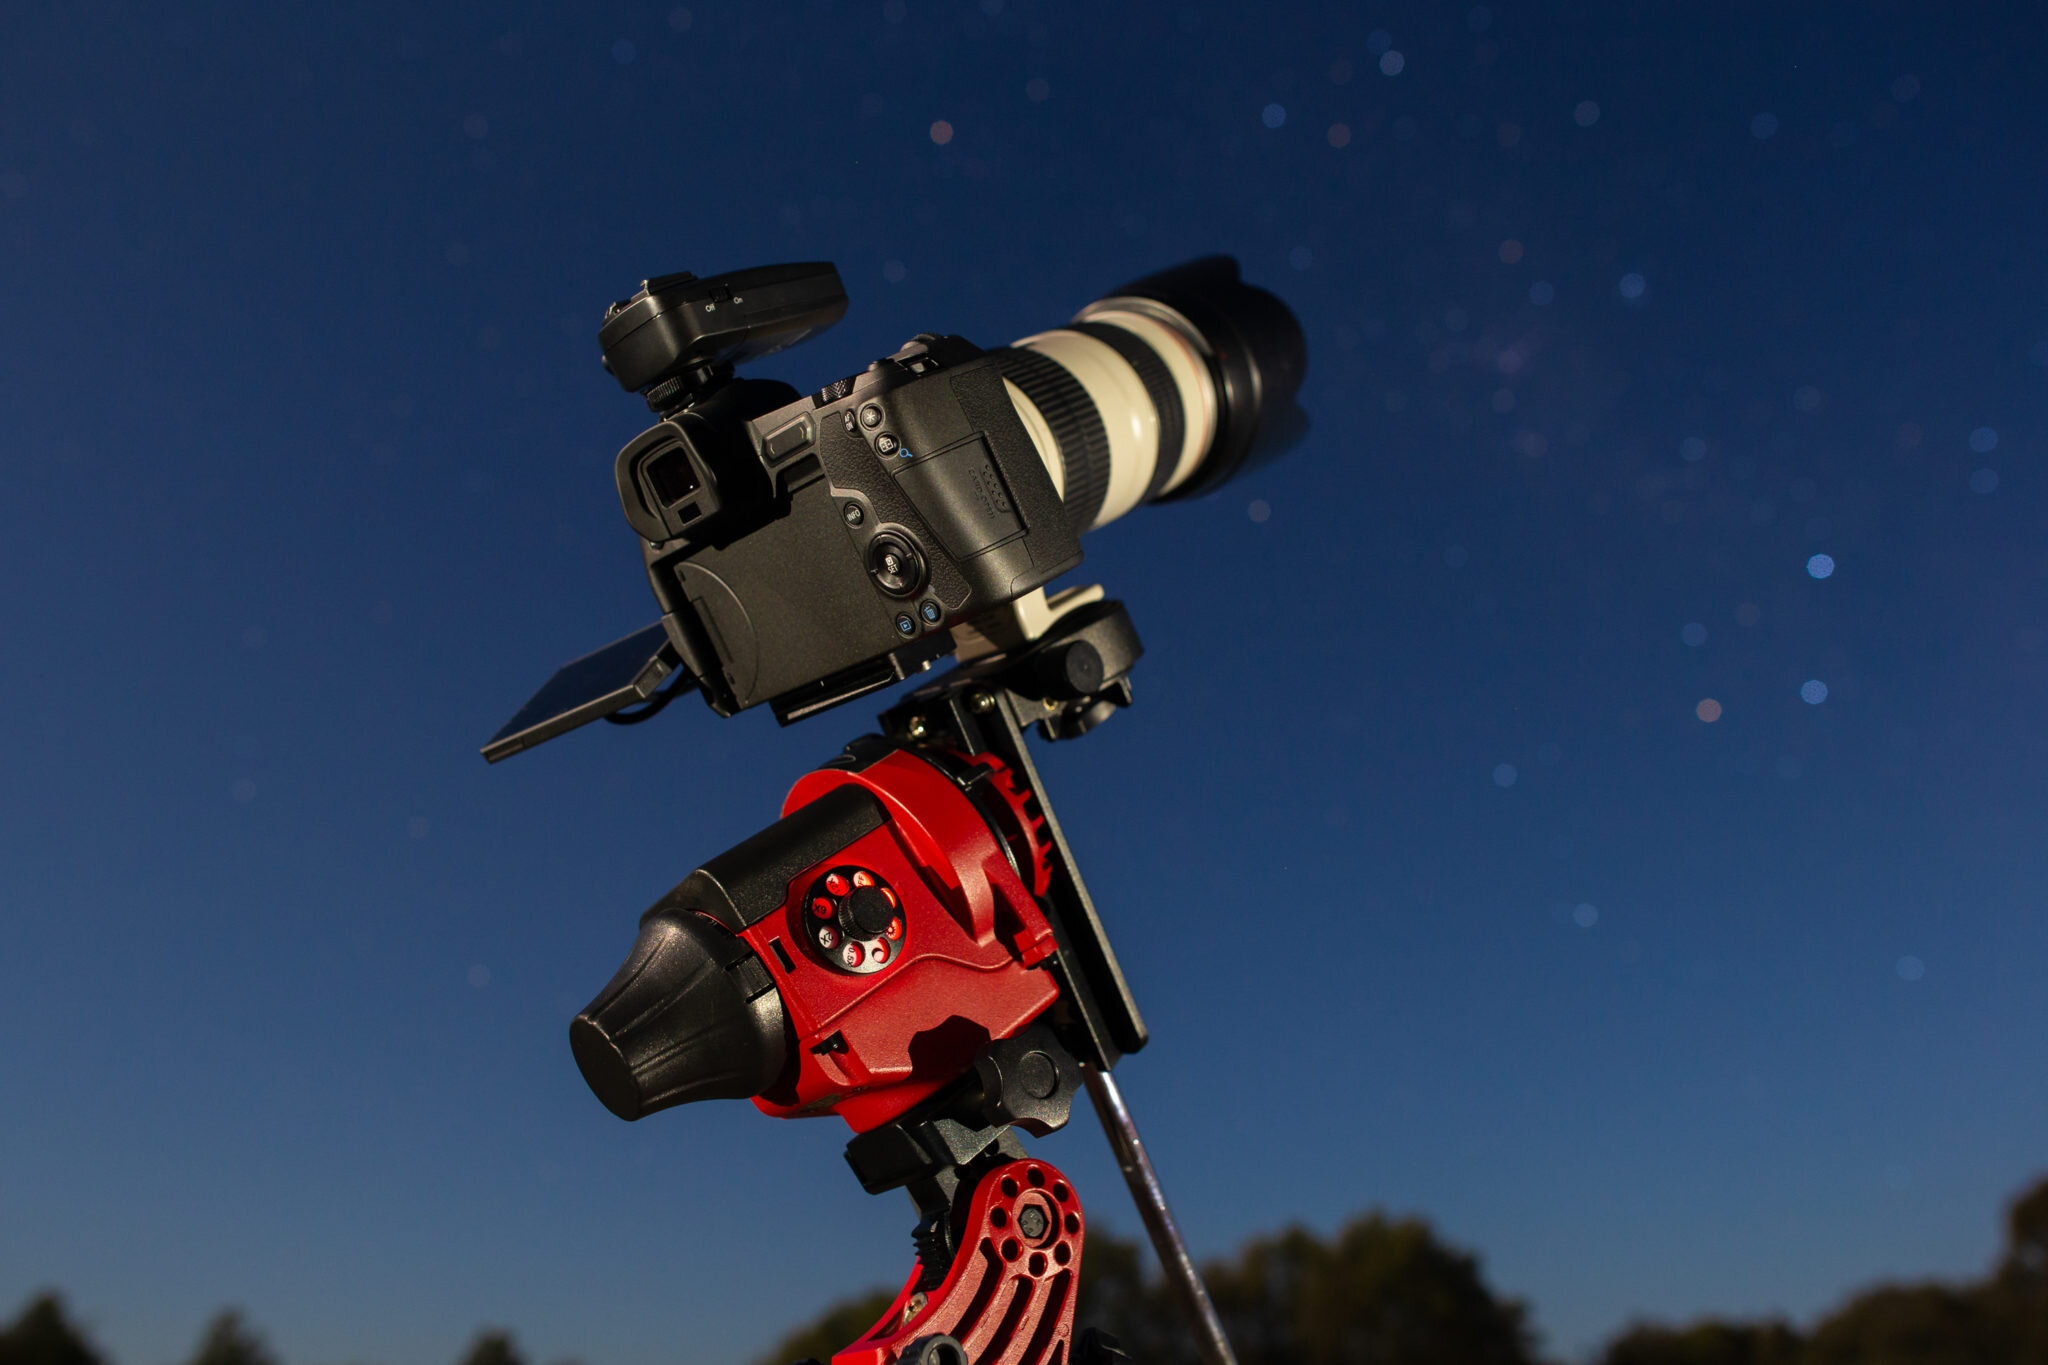
The Skywatcher Star Adventurer tracking mount. Image credit: nightscapephotographer.com
Despite being very versatile, these mounts are not suitable to work with large and heavy telescopes.

My 2017-2018 imagery with the Skywatcher Star Adventurer using telephoto lenses for deep sky and a small Skywatcher Skymax 90/1250 Maksutov telescope.
The Problem With Gear Acquisition Syndrome
Buying a telescope to replace photographic telephoto lenses is the most obvious way to go closer to your target. But this is not the best idea.
Good telescopes are usually large and heavy and while they may sit on the Star adventurer without falling down, the image quality will not be as good as you would expect.
Doing Astrophotography with a scope is a whole different game: you need sturdier, heavier and expenses computerized mounts to take advantage of large refractors and reflector telescopes.
Then you also need accessories such as guiding systems, field flatteners, heavy power tanks to power up your gear, etc.
What about long telephoto lenses made for wildlife photography? They have a good focal length, but they may also be “slow” f/5.6 lenses or worse.
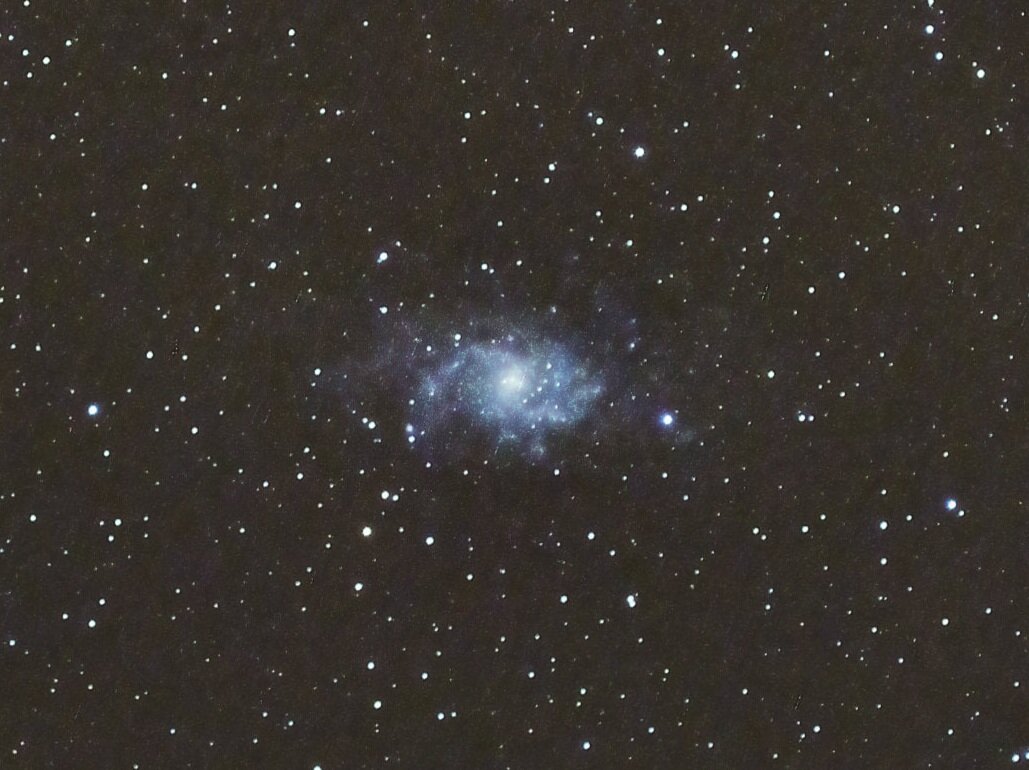
My first image of M33 taken with a Canon EF 300 f/5.6 on Olympus OM-D EM-5 Mk ii.
The image above shows my first attempt to photograph M33, the Triangulum Galaxy. Knowing it is a small target, I decided to put on my Olympus OM-D EM5 Mk ii an old Canon EF 300 f/5.6. This setup gives me the field of view of a 600mm lens on a full-frame camera.
While the total weight was well below the max payload for the Star Adventurer, the focal length made tracking accuracy critical. Even doing an accurate polar alignment, to get a good number of images, I could not expose longer than 40”. And to reduce chromatic aberration I stepped down the lens to f/6.3
As you see the galaxy is not very well detailed and quality is crippled by the heavy noise reduction needed.
In short, the risk is to over-complicate the setup, getting frustrated and that the cost for the new gear will not translate in the expected superior image quality.
So, what can we do to get closer and produce images of good quality? One word: Drizzle.
Learn To Drizzle To Be A Happier Star Tracker User
I recently stumbled upon the concept of Drizzle.
This technique is implemented in the free Deep Sky Stacker (DSS) and other astrophotography related software.
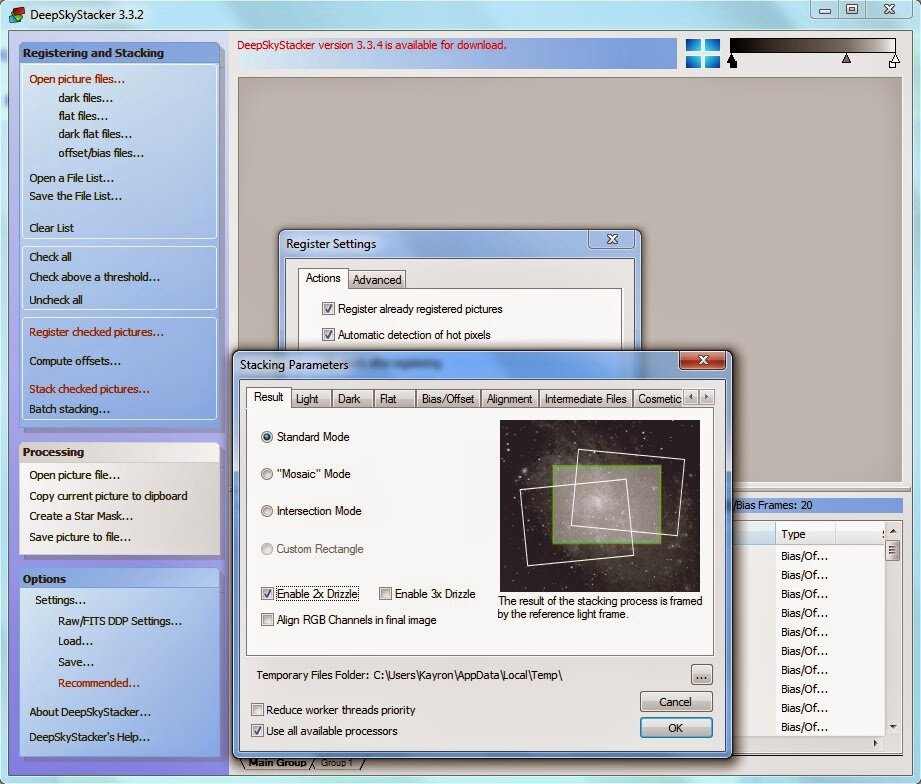
Enabling Drizzle in DSS.
In short, what drizzle does is to combine the light frames in a way to "supersample" the stacked image. This creates a larger image with increased details. Here you can read some more technical info about DSS and Drizzle.
For drizzle to be effective, we should use a high number of GOOD frames, which are dithered (or with some random tracking errors among them) and slightly undersampled.
Using a tracker unguided and a middle focal length automatically fulfills those requirements.
In practice, what drizzle does is allowing us to have a less demanding imaging setup to collect good data and let the image processing take care to enlarge and oversample our target.
This will make the small galaxies and DSO possible targets for those using a tracker, without the complications to use long lenses or guiding systems.
Drizzle Vs Photoshop Enlargement
You could ask why to use Drizzle when you can enlarge an image in Photoshop.
My understanding, both from the theory and tests, is that drizzle gives far superior images than photoshop enlargement.
This because drizzle it uses and combines actual data in different ways when creating the stacked image. On the other hand, image enlargement in Photoshop is done "after-the-fact", using only the stacked image.
Stacked Vs Stacked & Drizzled 2X comparison for M31 and M33. Samyang 85 f/1.8 @ f/2, ISO 640 on Olympus EPL-6, for a total 30 lights each 120s long. Darks, flats and bias files have been used to calibrate the data.
M33 Case Study: Long Focal image VS Drizzled Images
Still wondering if this drizzle thing really is the holy grail of star tracker astrophotography? Ok, let’s consider the image of M33 I have shown before, the one taken with the Canon EF 300.
Below, I compare that image with a drizzled 2X image obtained staking 30 images with a Samyang 85 f/1.8 on Olympus EPL-6.

M33 with Canon 300 f/5.6 (left) Vs drizzled 2x image od M33 with Samyang 85 f/1.8.
The Samyang 85 f/1.8 is more than 2 stops faster than the Canon EF 300 and it is usable at f/2: this will let you collect as much as 4 times more light than the Canon EF 300.
Also, the Samyang on my micro four-thirds Olympus camera has an equivalent focal length (EFL) of 170mm while the Canon has EFL of 600mm. This means that with the Star Adventurer I can expose for 3 minutes and still get pinpoint stars.
Here I was exposing for 120”, 3 times longer than with the Canon. In total, per each frame, with the Samyang, I was able to collect more than 8 times the light than with the Canon lens. This has a huge impact on the final image quality.
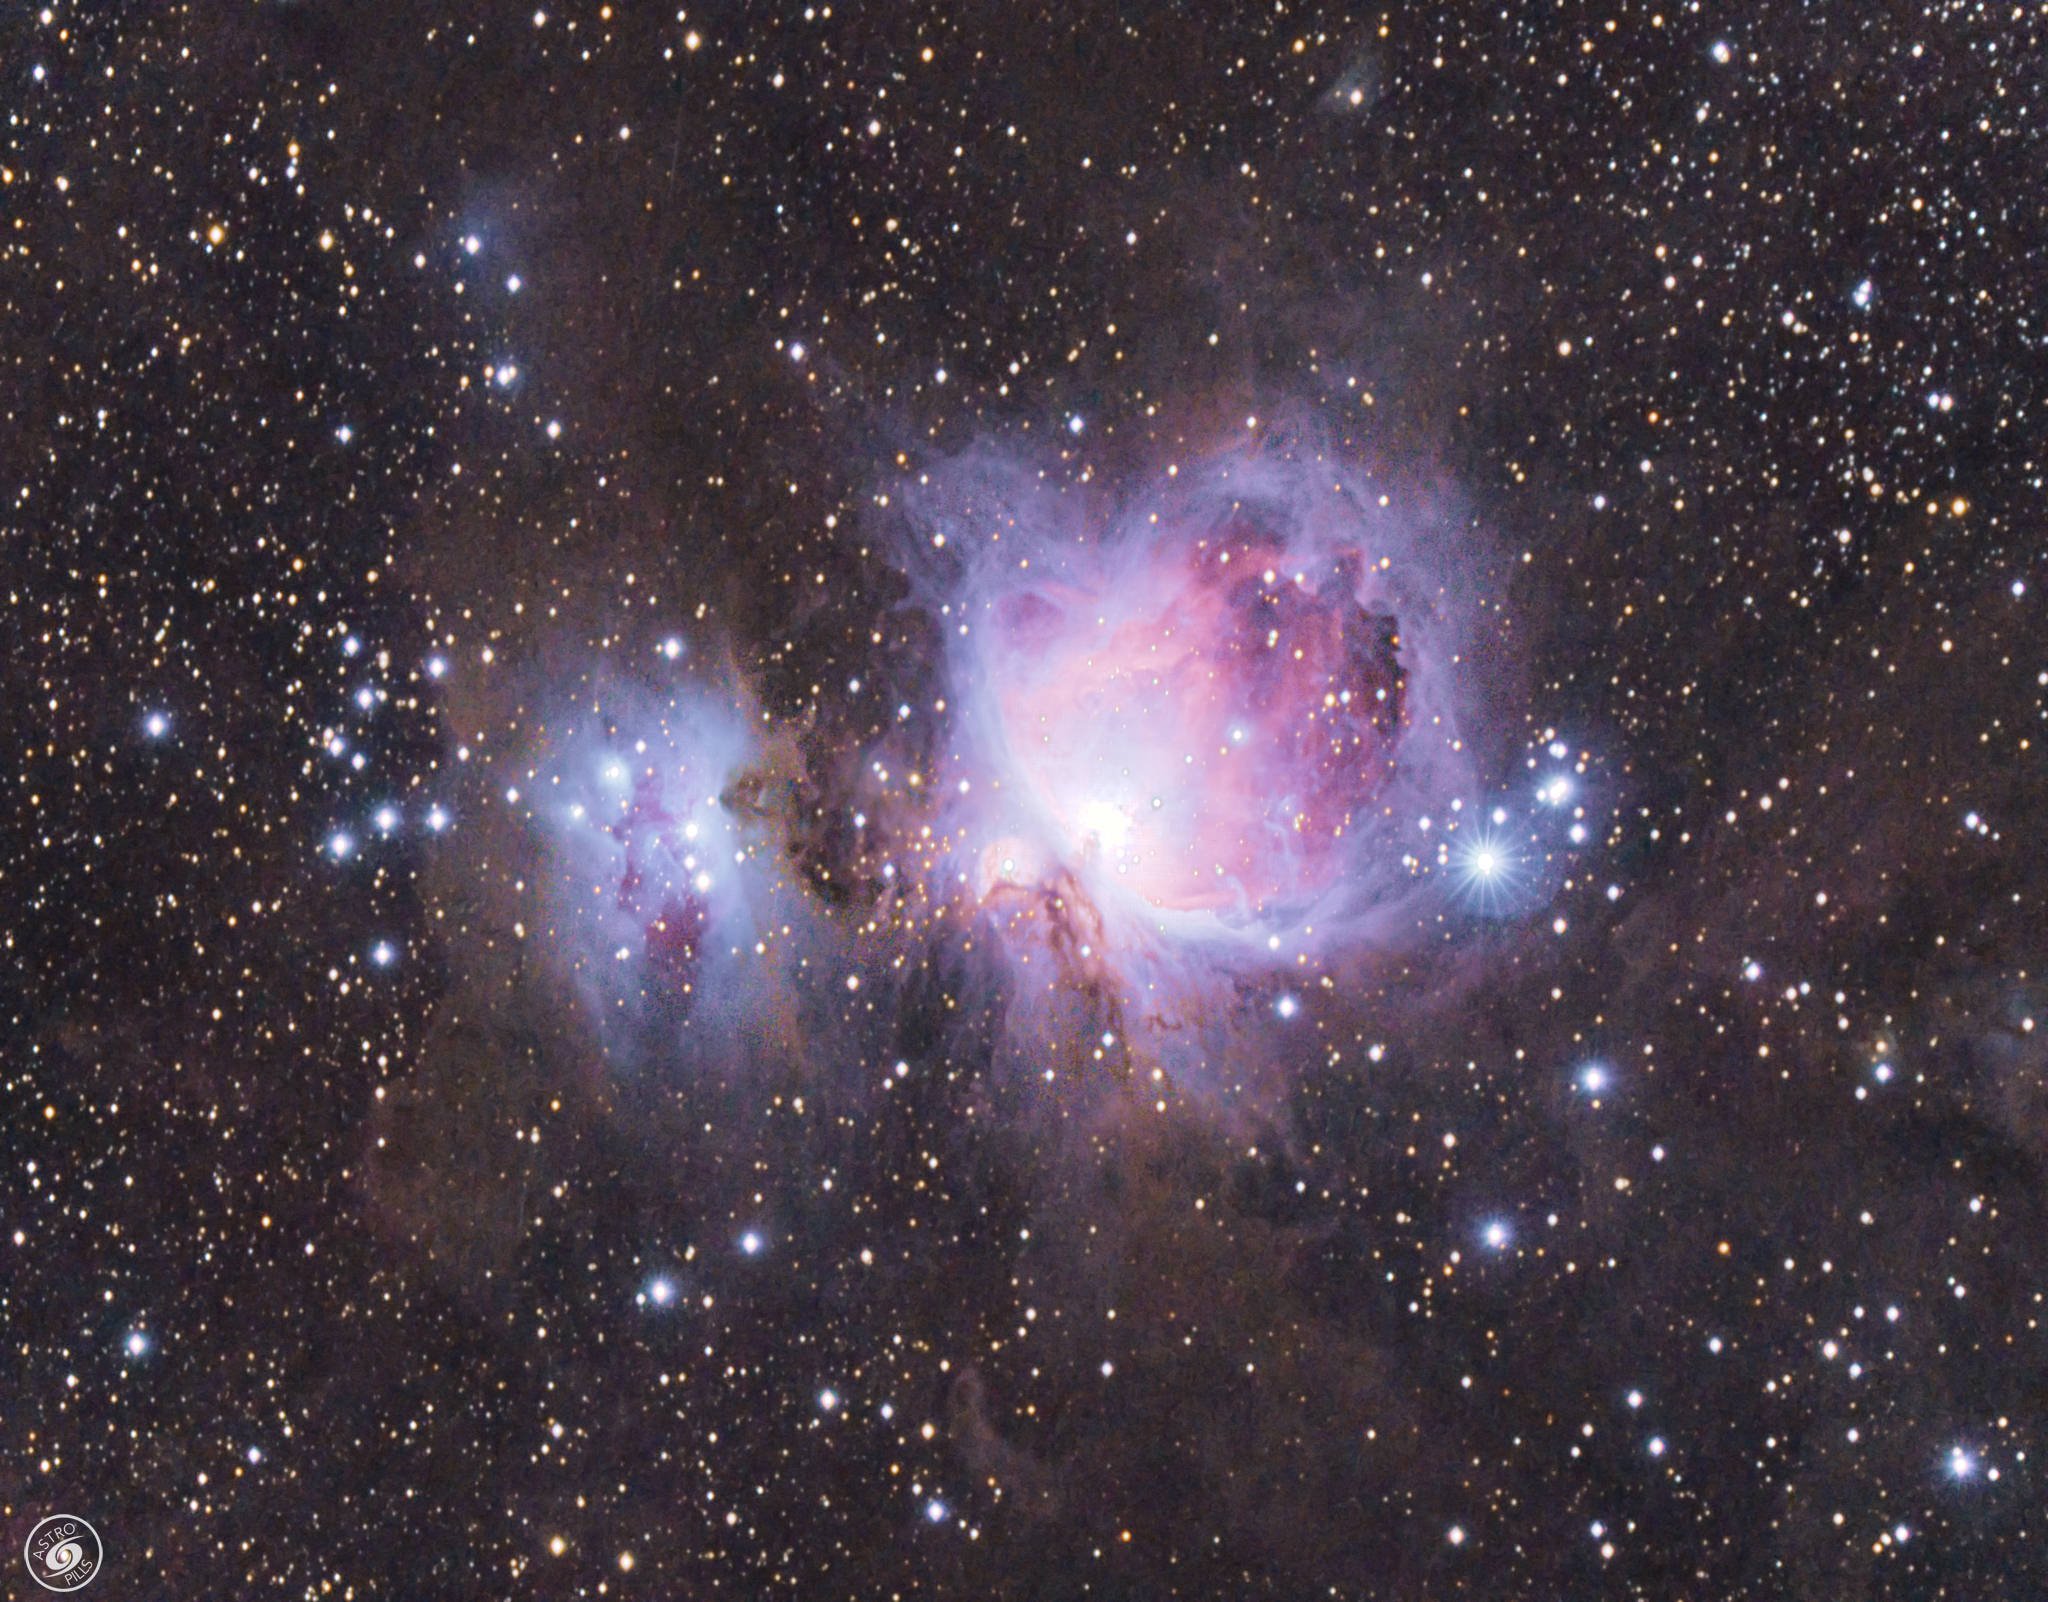
Few Drizzled Examples


Conclusions
The message I am trying to share is that you should invest to get a the best possible lens for your star tracker and drizzle 2x or 3X when you need to close in on your target more. This is a much better way to use your tracker than loading it with large lenses, guiding systems, and so on. Particularly if you are a beginner and you are on a budget.
Excellent lenses for star trackers are the Samyang/Rokinon 85 f/1.4 or f/1.8 and the Samyang/Rokinon 135 f/2. Check Astrobin if you don't believe me.
Notes
Here we are not trying to do a rigorous comparison between images: what we are trying to do is simply convey the message that on a tracker it is often best to work with a fast, short focal setup and then drizzle to go closer rather than using one with a longer focal length, which is much more demanding on the mount.