
I don’t own a full format camera, nor a cooled camera. I either use an Olympus M43 camera (E-PL6 or OM-D EM-5 Mk ii) or the ZWO ASI183MC (not the pro model).
While I think those cameras are good, I often end up with a grainy background.
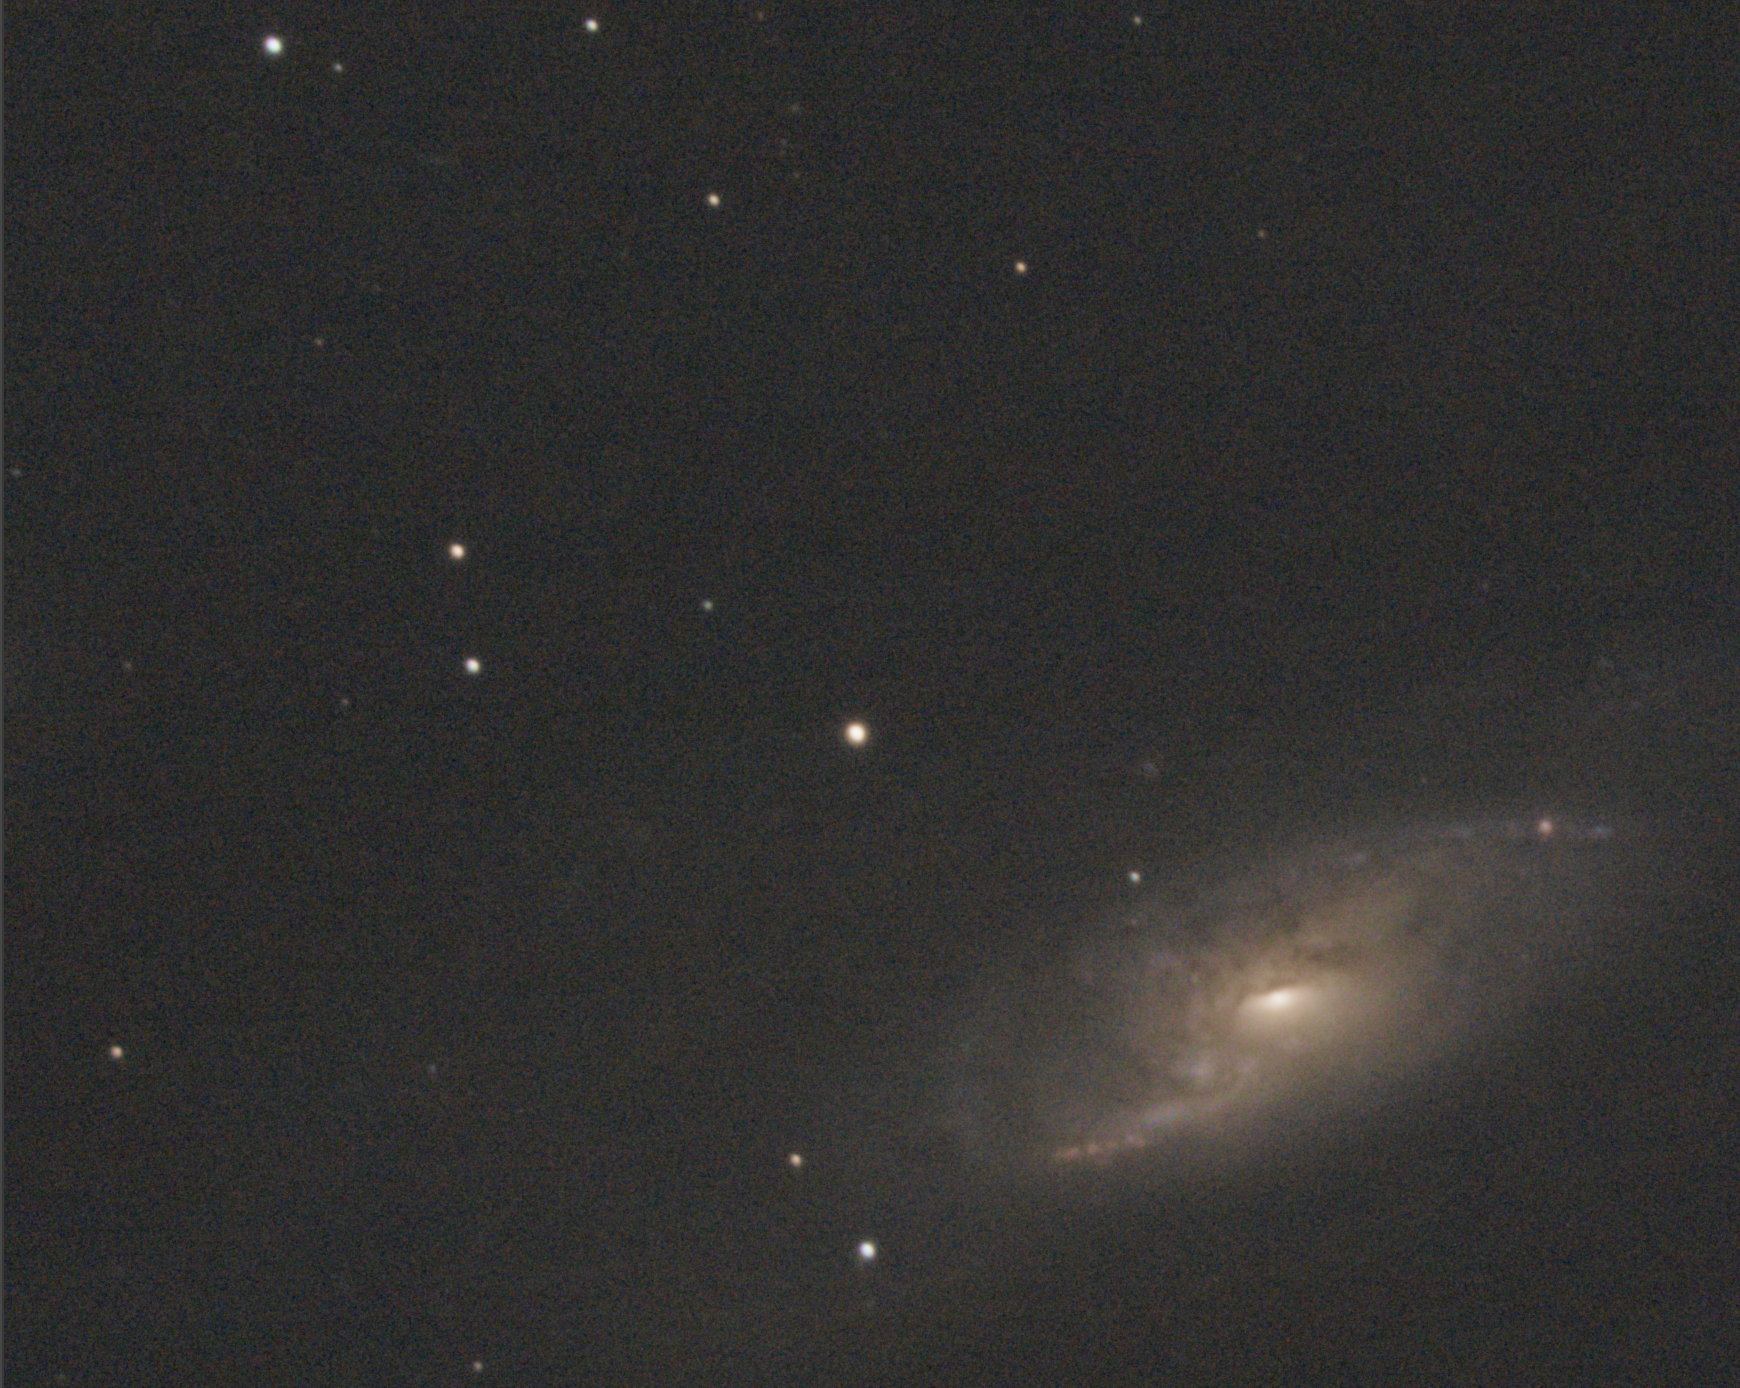
This is a 100% crop of a stack of 4hrs worth of data on M106. Celestron C5 reduced, ASI183MC on SkyWatcher Az-GTI.
As you can see the background looks grainy, but we can improve it quite a bit with this simple technique. We will do that in Photoshop.
Duplicate the level with cmd+j (Mac) or ctrl+j (Windows);
Got to Filter->Blur and choose Average … This will create a new Solid Color Layer with the average color for the image. More often than not, in astrophotography this is the color of the black sky;
Blend the new layer with Lighten Mode. This will lift the “darkest” grains and the background will look more smooth;
Use the Levels (cmd+L / Ctrl+L) or Curves (cmd+M / ctrl+M) to brighten the solid color to repair the background;
Change the Opacity of the layer to tweak the strength of the effect;
Should the black sky look fake, go to Filter -> Noise ->Add Noise … and add a little bit of noise to the layer with the solid color.

The workflow in pictures.
At this point you can create a snapshot of your layers (cmd+option+shit+e / ctrl+alt+shift+e) and use the dehaze slider in Adobe Camera Raw (cmd+a / ctrl+a) to darken the background.
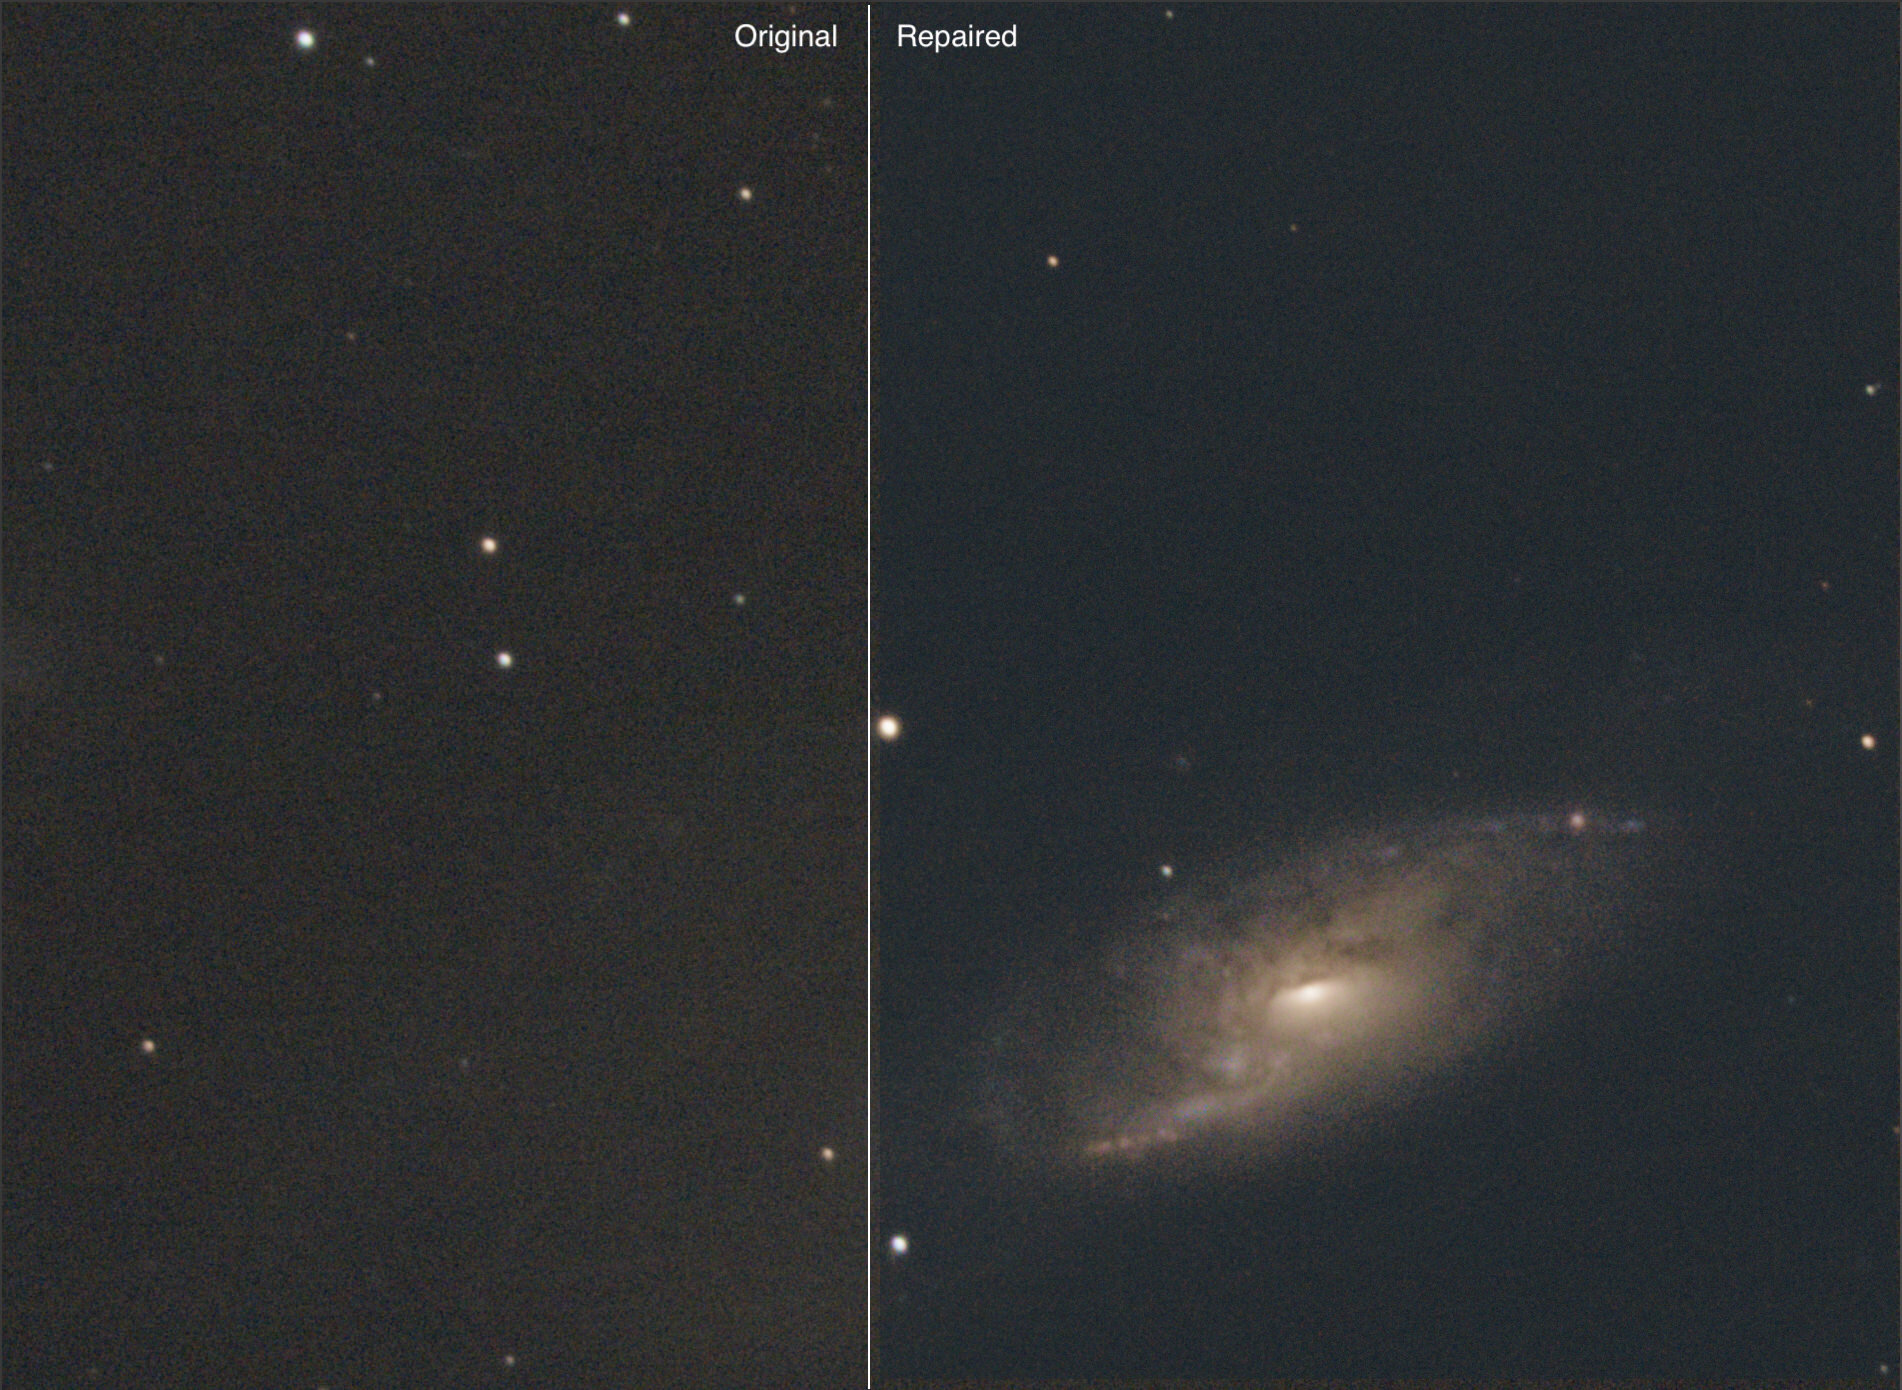
Comparison between the background in the original image and the background after repair.