

This is the story of how an alt/az mount is becoming one of the most attractive mounts for the amateur deep-sky astrophotographer on the move (or on a budget).
Once upon a time, astrophotography was a thing for the “real” men and women, far from being mainstream.
But then the Sky-Watcher Star Adventurer came out and it was a game-changer, bringing astrophotography to the mass. Affordable, capable, lightweight, and compact, it was the perfect instrument for wetting our feet in the astrophotography pool.
Its biggest rival was the iOptron SkyGuider, a tracker within the same class: the choice between the two basically boiled down to personal taste.
In recent years, though, both the Sky-Watcher Star Adventurer PRO and the iOptron Sky Guider PRO had a new competitor, an outsider set to conquer the market: the Sky-Watcher AZ-GTI alt/az mount.
The AZ-GTI: Sky-Watcher Most Portable Alt/Az Mount
Alt/Az mounts are great for observing the many wonders of the Universe with your telescope, as they are easy and intuitive to use.
The Sky-Watcher Az-GTI is an affordable and portable alt/az mount offering a max payload of 5kg, wireless connectivity, GOTO functionality, and a lovable Point&Track feature.
You can easily pop on it a telescope like the Sky-Watcher Skymax 127/1500 or a Celestron C5 and enjoy observing and photographing the Moon, the Sun, and the planets within minutes and pretty much from everywhere.

Here is how I photograph the Sun from within my apartment in Brussels with the Az-GTI.
All you need to begin imaging or observing with the Az-GTI is connecting your smartphone to the mount using the WiFi connection, leveling the tripod, and locating your target.
For this, you can use the Star Alignment and GOTO functionalities offered any the Synscan PRO app or, even faster, you can use a star finder and use the Point&Track feature by choosing the framed target from the list of targets available in the Synscan PRO app.
The Az-GTI Is A Fully Computerised EQ Mount In Disguise
When it comes to deep-sky astrophotography, where long exposures are required, alt/az mounts suffer from a deadly flaw: they do not correct for field rotation. Here is where you want to put your money on an equatorial mount.

The working principles of alt/az and equatorial mounts.
Because everything up there revolves in circles around the celestial pole, but the mount itself is not aligned to the pole, an alt/az mount can keep your target in the field of view of the instrument but cannot compensate for the rotation of the target.

Field rotation with the Orion constellation.
And while popping your alt/az mount on an equatorial base can help to deal with the field rotation, it is still not good enough for the long exposures used for deep-sky astrophotography. An alt/az mount, in fact, tracks with left/right, up/down steps and not in a linear way, resulting in weird stars.

You need more than this. You need the Az-GTI.
Why? Because despite Sky-Watcher keeps stating this mount is not intended for deep sky astrophotography, it did release an official firmware upgrade that allows the mount to work in bot alt/az and equatorial mode.
To upgrade the Az-GTI to work in the equatorial mode you need to upgrade the firmware with the AZGTi Mount, Right Arm, AZ/EQ Dual Mode, Version 3.26 firmware you can download from the official site.
With this firmware, when you select the equatorial mode, the mount stop tracking in up/down and left/right steps but does that linearly as the real equatorial mounts and the Star Adventurer PRO do.
You have now a fully computerized equatorial mount that fits in the palm of your hand.

Az-GTI VS Star Adventurer PRO 2i: How Much They Costs?
The Star Adventurer PRO 2i, which is the latest version of the Star Adventurer, featuring WiFi connectivity, costs in Europe (and at the time of writing) 529€.
The price includes a wedge and a built-in polar scope to allow polar aligning the Star Adventurer, a declination bracket with counterweight, a ball head adapter for shooting starry landscapes and time lapses, and a polar scope illuminator.
The Az-GTI costs 529€ in a bundle with the Sky-Watcher field tripod and mini pier or 419€ only the mount. None of the extra accessories you will need to run the mount in equatorial mode are included.
With a 5kg max payload, both mounts can be used in a wide range of configurations, from using a wide-angle lens and your DSLR camera to small refractors with cooled astro cameras. As a consequence, the budget will vary greatly.
To be fair in the comparison, I assume that out of the box, i.e. with manual polar alignment and no guiding, the Star Adventurer PRO is able to deliver round stars with a good keeping rate (the number of frames not ruined by tracking errors) when exposing the sky for 120” using a 200 mm lens.
This rules out the use of a laser to polar align the mount: while great for using wide-angle lenses, this method is not accurate enough to allow such longer exposure with such a long focal length.
The question now becomes: how much will it cost you to pimp the Az-GTI to perform as the Star Adventurer out of the box? If buying new gear, you will have to pay about 250€ for the needed accessories.
From these 250€, though, you have to consider the initial cost of the mounts.
If you need a tripod for your Star Adventurer, the Sky-Watcher field tripod costs 90€, and 35€ goes for the pier. Since the Star Adventurer PRO 2i and the AZ-GTI in a bundle with tripod+pier cost the same, the actual difference between the two setups is about 130€, with the Star Adventurer being the cheaper.
If you already have a tripod, you could buy the Az-GTI only for 420€ instead of 529€. Add the 250€ in needed accessories to use the Az-GTI in equatorial mode and, once again, the Star Adventurer will be about 130€ cheaper.
All considered, the Star Adventurer is cheaper, but not by much. Though, these cold numbers do not tell the whole story.
What Accessories Would You Need To Run The Az-GTI In Equatorial Mode?

So, what accessories do you need to buy for this 250€ extra budget?
A wedge to put between the mount and the tripod. This will allows you to polar align your mount. The Wedge of the Star Adventurer PRO will work for the Az-GTI too and for 80€ if comes with the prism rail;
A prims rail to mount your camera/lens on the Az-GTI: this will set you back of about 20€;
A counterweight. The 1kg counterweight with shaft for the star adventurer is ok and costs about 33€. Though, the shaft has a M8 thread while the socket of the Az-GTI is M12 (metric). Either you buy a M8/M12 metric adapter or you cut a M12 threaded rod you can get for few € at your local hardware store.
Now there is the problem of how to precisely polar align your Az-GTI, as it does not come with a polar scope (although it has a polar alignment routine you can use after executing a star alignment for the mount).
To achieve performances similar to that of the Star Adventurer PRO, should you find difficult to use the built-in PA routine, you need a polar scope: Artesky has a prims rail made for the Az-GTI (which allows the mount to clear the locking knob of any wedge spearing you from modding the wedge).
This rail costs 70€ and allows you to mount the polar scope of the Sky-Watcher HEQ5 (50€). Now you can align the Az-GTI as you would do with the built-in polar scope of the Star Adventurer and an app such as Polar Scope Align PRO.
Unfortunately, the polar scope of the HEQ5 is like the one of the Star Adventurer: the position of Polaris is not defined by the relative position of different stars but you need to place it on the reticle clock in a specific position.

The reticle used in the Polar Scope shown by the Polar Scope Align Pro app.
For precise polar alignment you should level the tripod and set the clock of the Polar Scope in a specific orientation that allows you to easily pick a line vertical to the ground as reference. You can read more about this in this post.
With the Az-GTI is difficult to get things precise for manual polar alignment so if you don’t want to go down the (more costly) road of electronically assisted polar alignment, the Star Adventurer offer a better and more precise polar alignment out of the box.
Of course, if you are shooting with a wide angle of short telephoto lens (about 100mm), you’ll be fine with the Az-GTI and this kit or even with a laser pointer (although it gives very coarse alignment, can annoy other astrophotographers and may be illegal in your country or in that area).
All in all, another 120€, for a grand total of 250€ and a net extra budget with respect to the Star Adventurer Pro 2i of 130€.
Of course you can find cheaper solutions, shop for the second hand market or 3D print the needed adapters and mounting rails, but I think I am being fair with my budget estimation.
How Do I Use My Az-GTI For Deep Sky Astrophotography
In this video I discuss the setup I built around the Az-GTI for deep sky astrophotography, after 6 years spend doing that with the Star Adventurer PRO (not WiFi).
Az-GTI Vs Star Adventurer PRO 2i: Which One Is For You?

130€.
This is the net extra budget you have to spend to make the Az-GTI perform as the Star Adventurer PRO 2i out of the box.
While I am a hard-core fan of the Star Adventurer, I have to admit that the Az-GTI is today a better choice for starting with astrophotography, and I would advise you to get that over the Star Adventurer PRO.
Some Az-GTI Pros:
With a similar size and weight of the Star Adventurer, it is as portable;
It can be used in alt/az mode for fast and easy observation and lunar/planetary astrophotography;
Works with 8AA batteries for better portability: no need of power tank and 8 Panasonic Eneloop PRO will last for multiple sessions;
It offers GOTO. You can read in this post I wrote here how to implement a manual GOTO for the Star Adventurer PRO, but for things longer than 400mm it is challenging to work without a real GOTO;
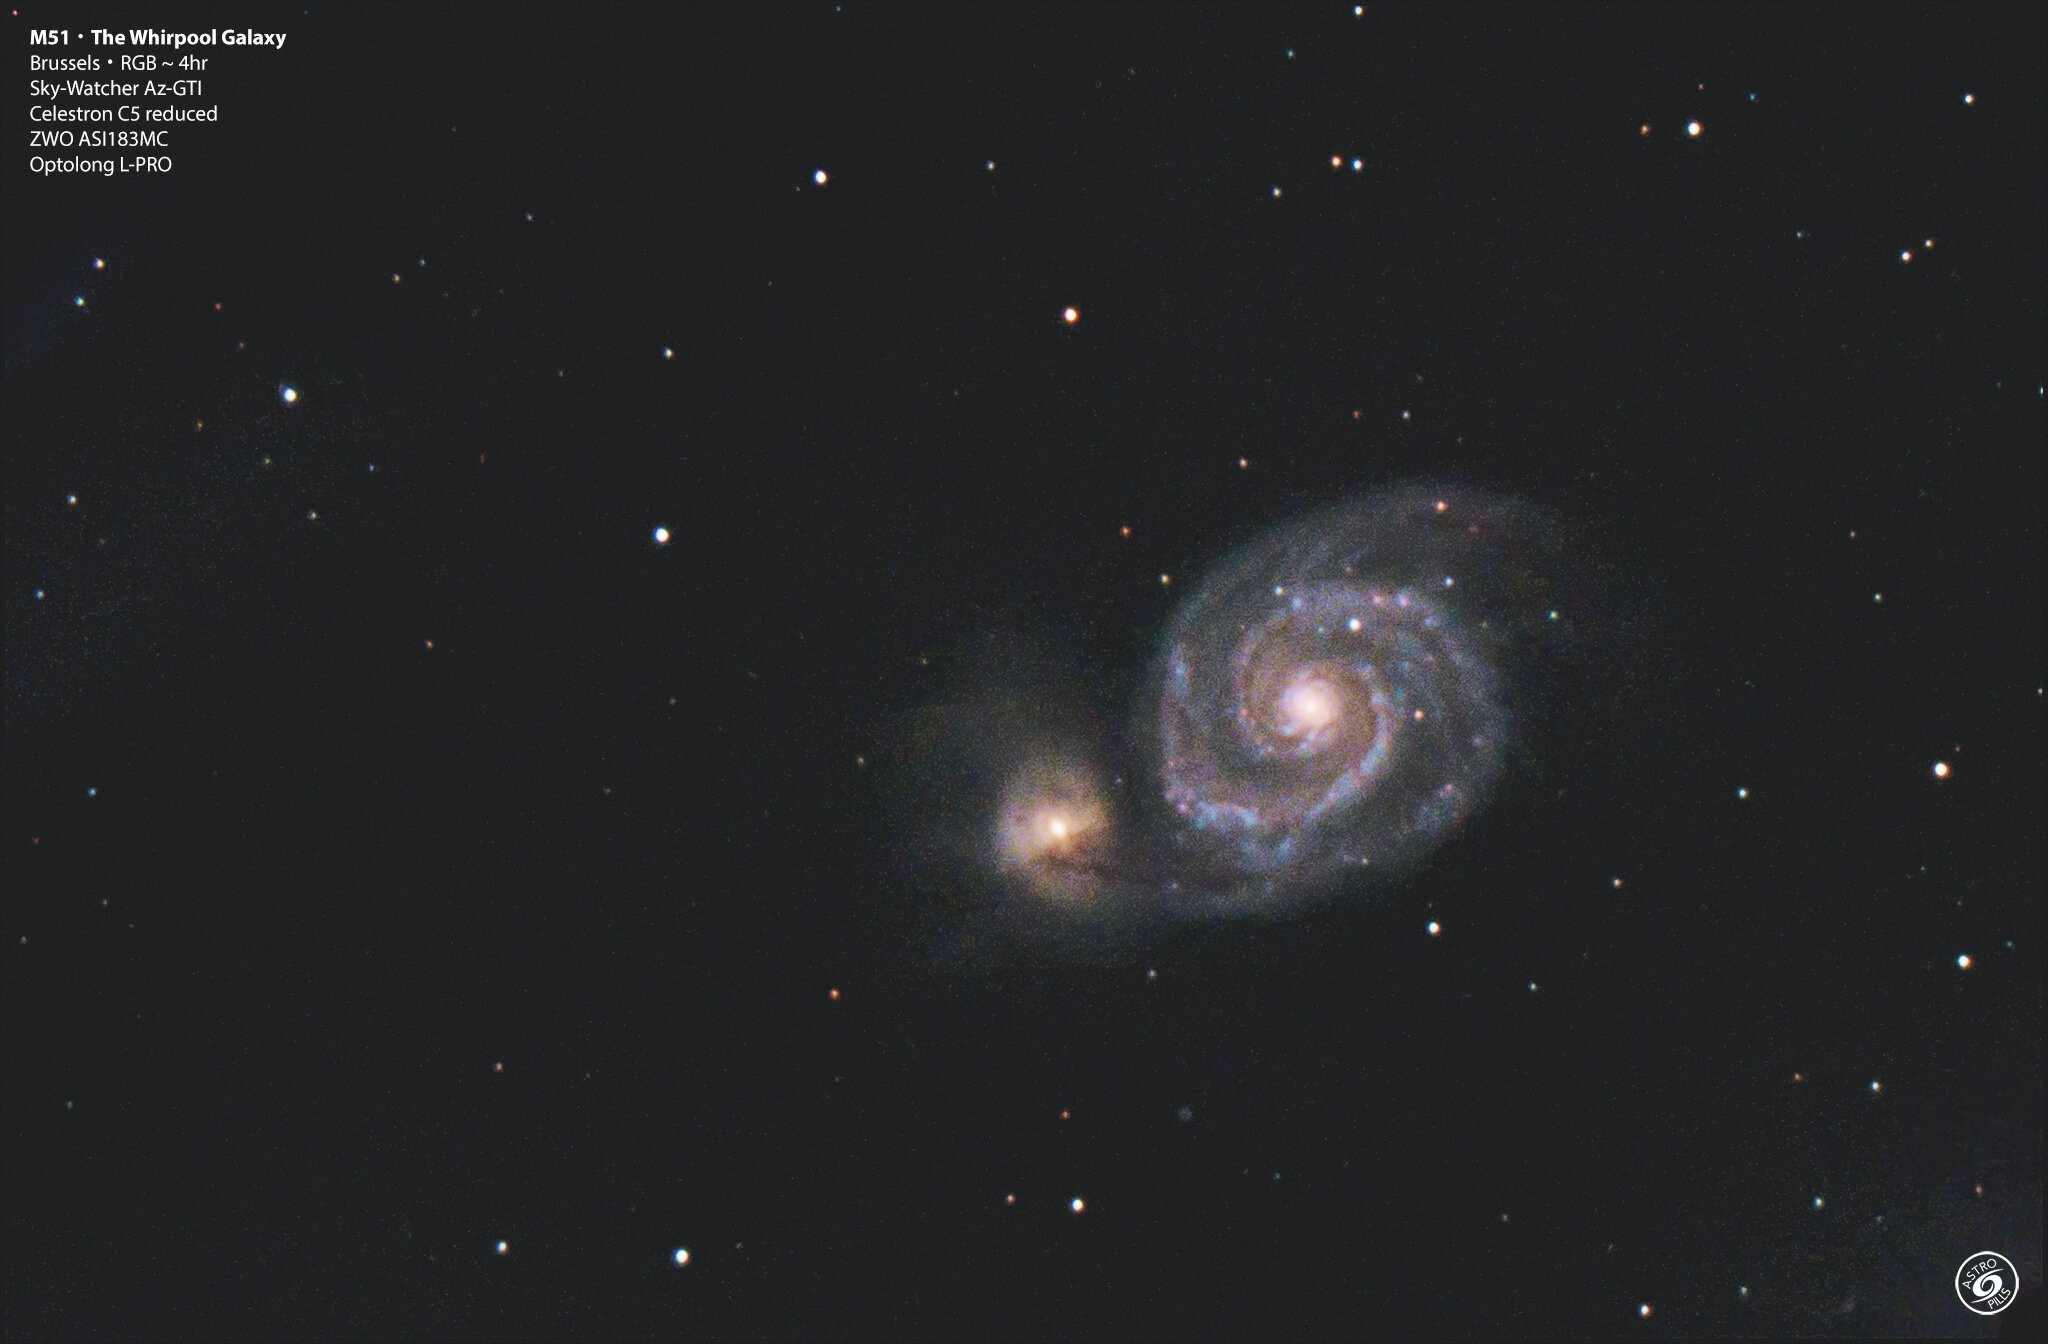
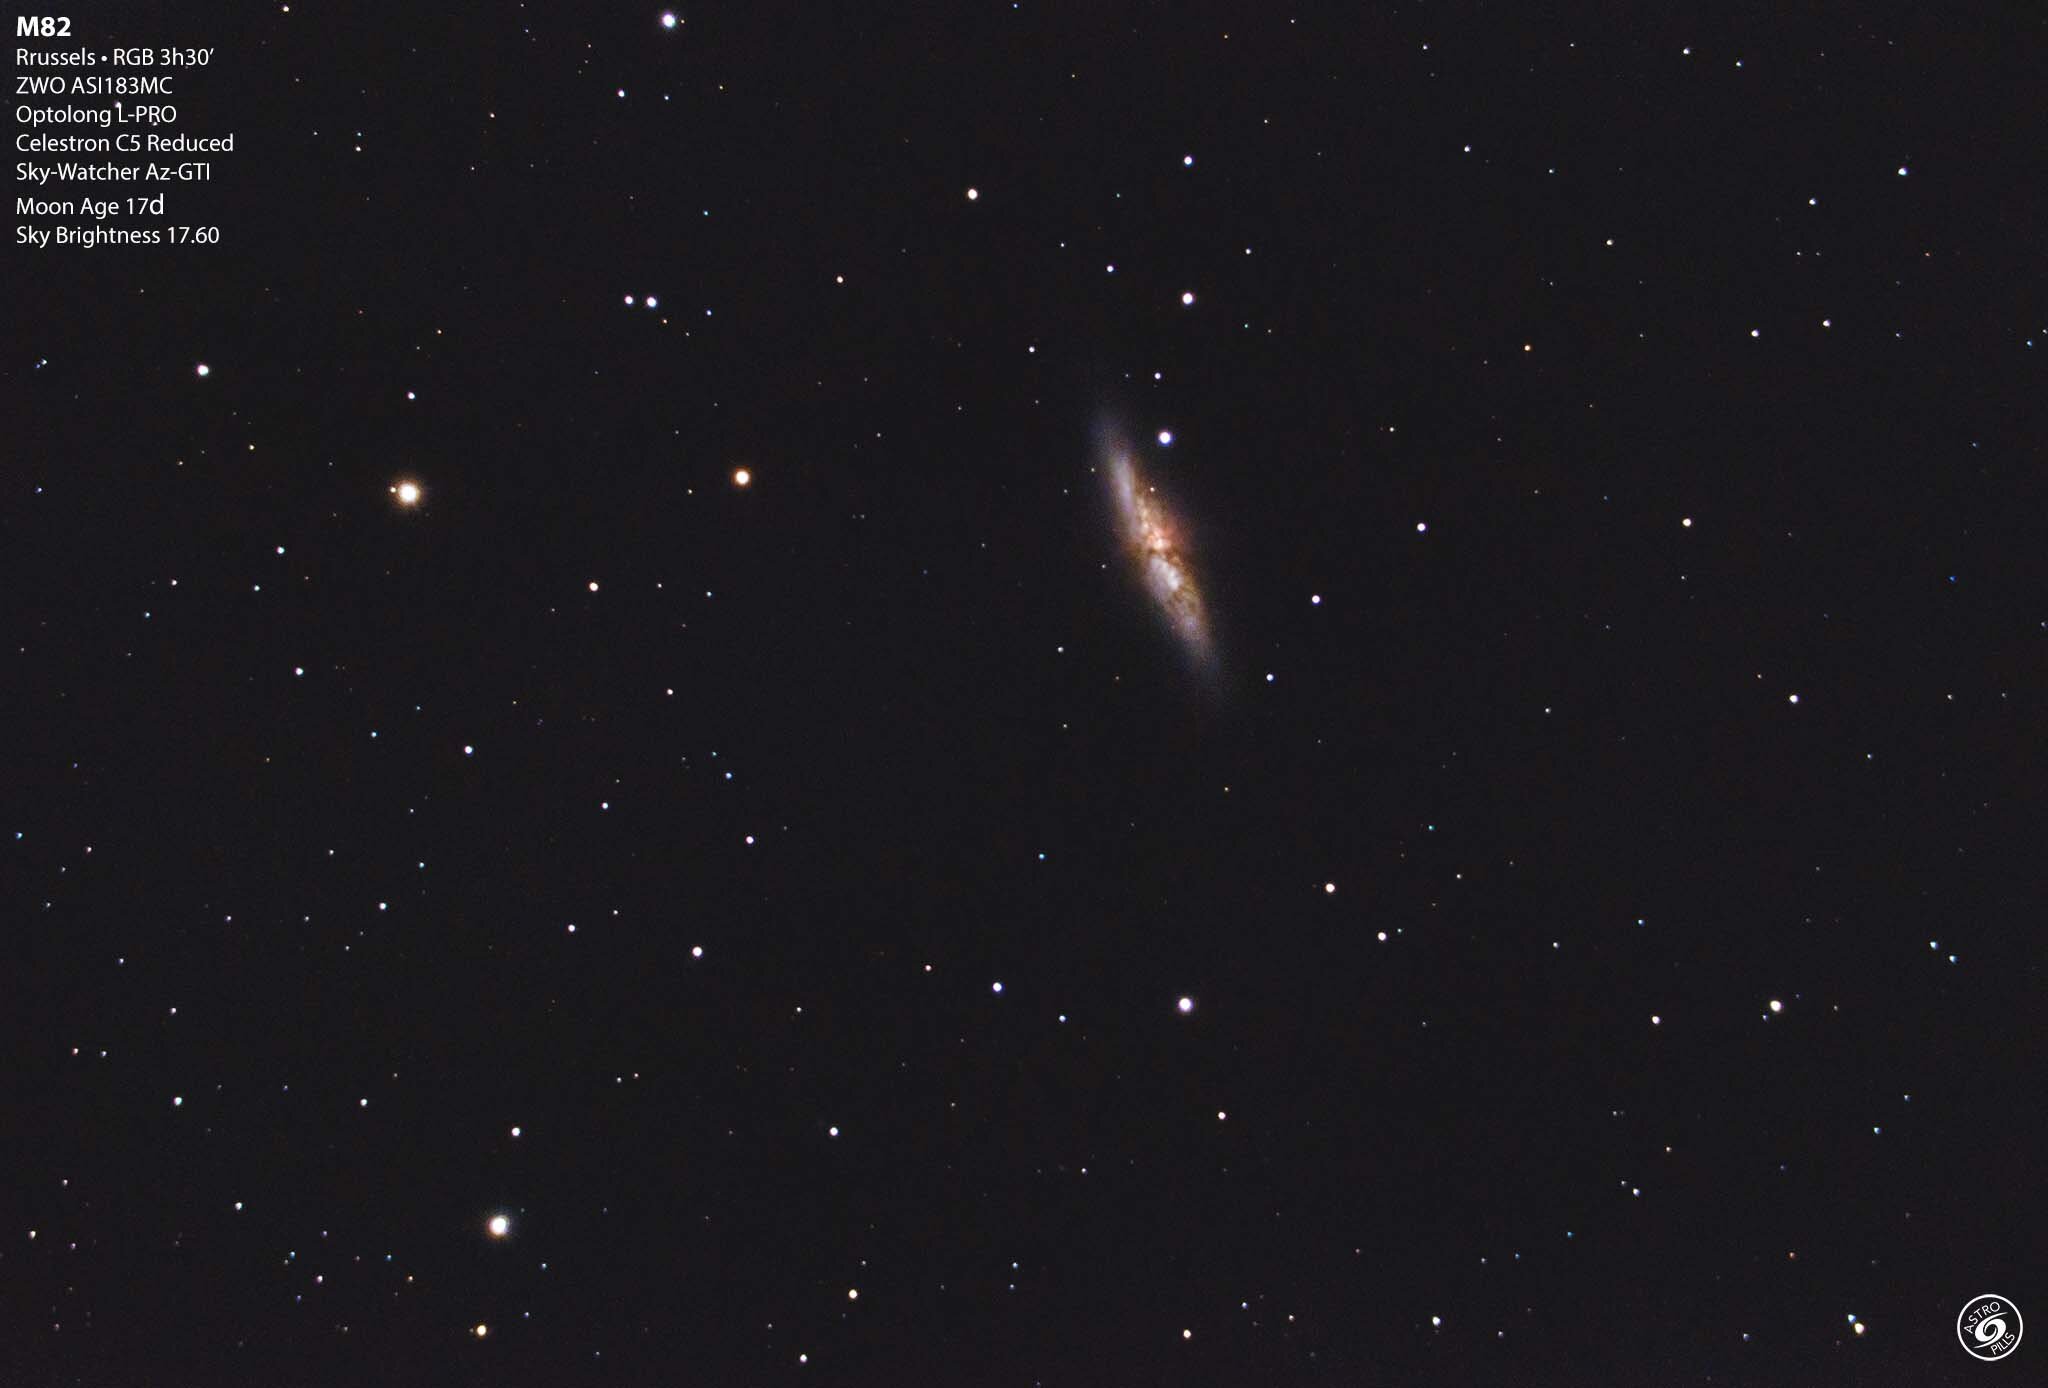
Very good performances: I can use my Celestron C5 with focal reducer to photograph galaxies, exposing for 120”/180”. Of course, guiding.
Some Az-GTI Cons:
To get the most out of the Az-GTI for deep sky astrophotography, you should use a fully computerized setup, such as the ZWO ASIAIR PRO, the Stellarmate, or a computer. While you will benefit from these systems with a Star Adventurer too, at least for guiding, with the Az-GTI it is almost “mandatory” to go down that route and the theoretical initial 130€ extra budget we calculated before is much more likely to increase dramatically;
Many users report problems when guiding in declination due to a large amount of backlash in the gears;
The free movement in right ascension is often stiffer than that in the Star Adventurer, making it difficult to achieve a good balance;
Building Quality is not constant. As with the Star Adventurer, you can get a good mount or one that needs some tuning right away to perform properly;
Is There Still A Place For The Star Adventurer PRO?
I believe there is, but not for long. The new version of the Star Adventurer added the WiFi connectivity and pulse dithering when the camera is controlled by the Star Adventurer, but that’s about it.
For keeping things as simple as possible, there are other trackers, such as the Omegon Minitrack LX2/LX3.
If you need something light and small, yet capable of offering some advanced controls there is the Star Adventurer Mini/ iOptron Sky Tracker.
But if you are considering the Star Adventurer PRO, you probably think you will get serious with astrophotography and you will likely be pushing it soon, with guiding and small refractors and even dedicated astro cameras.
And for this, the Az-GTI is superior.
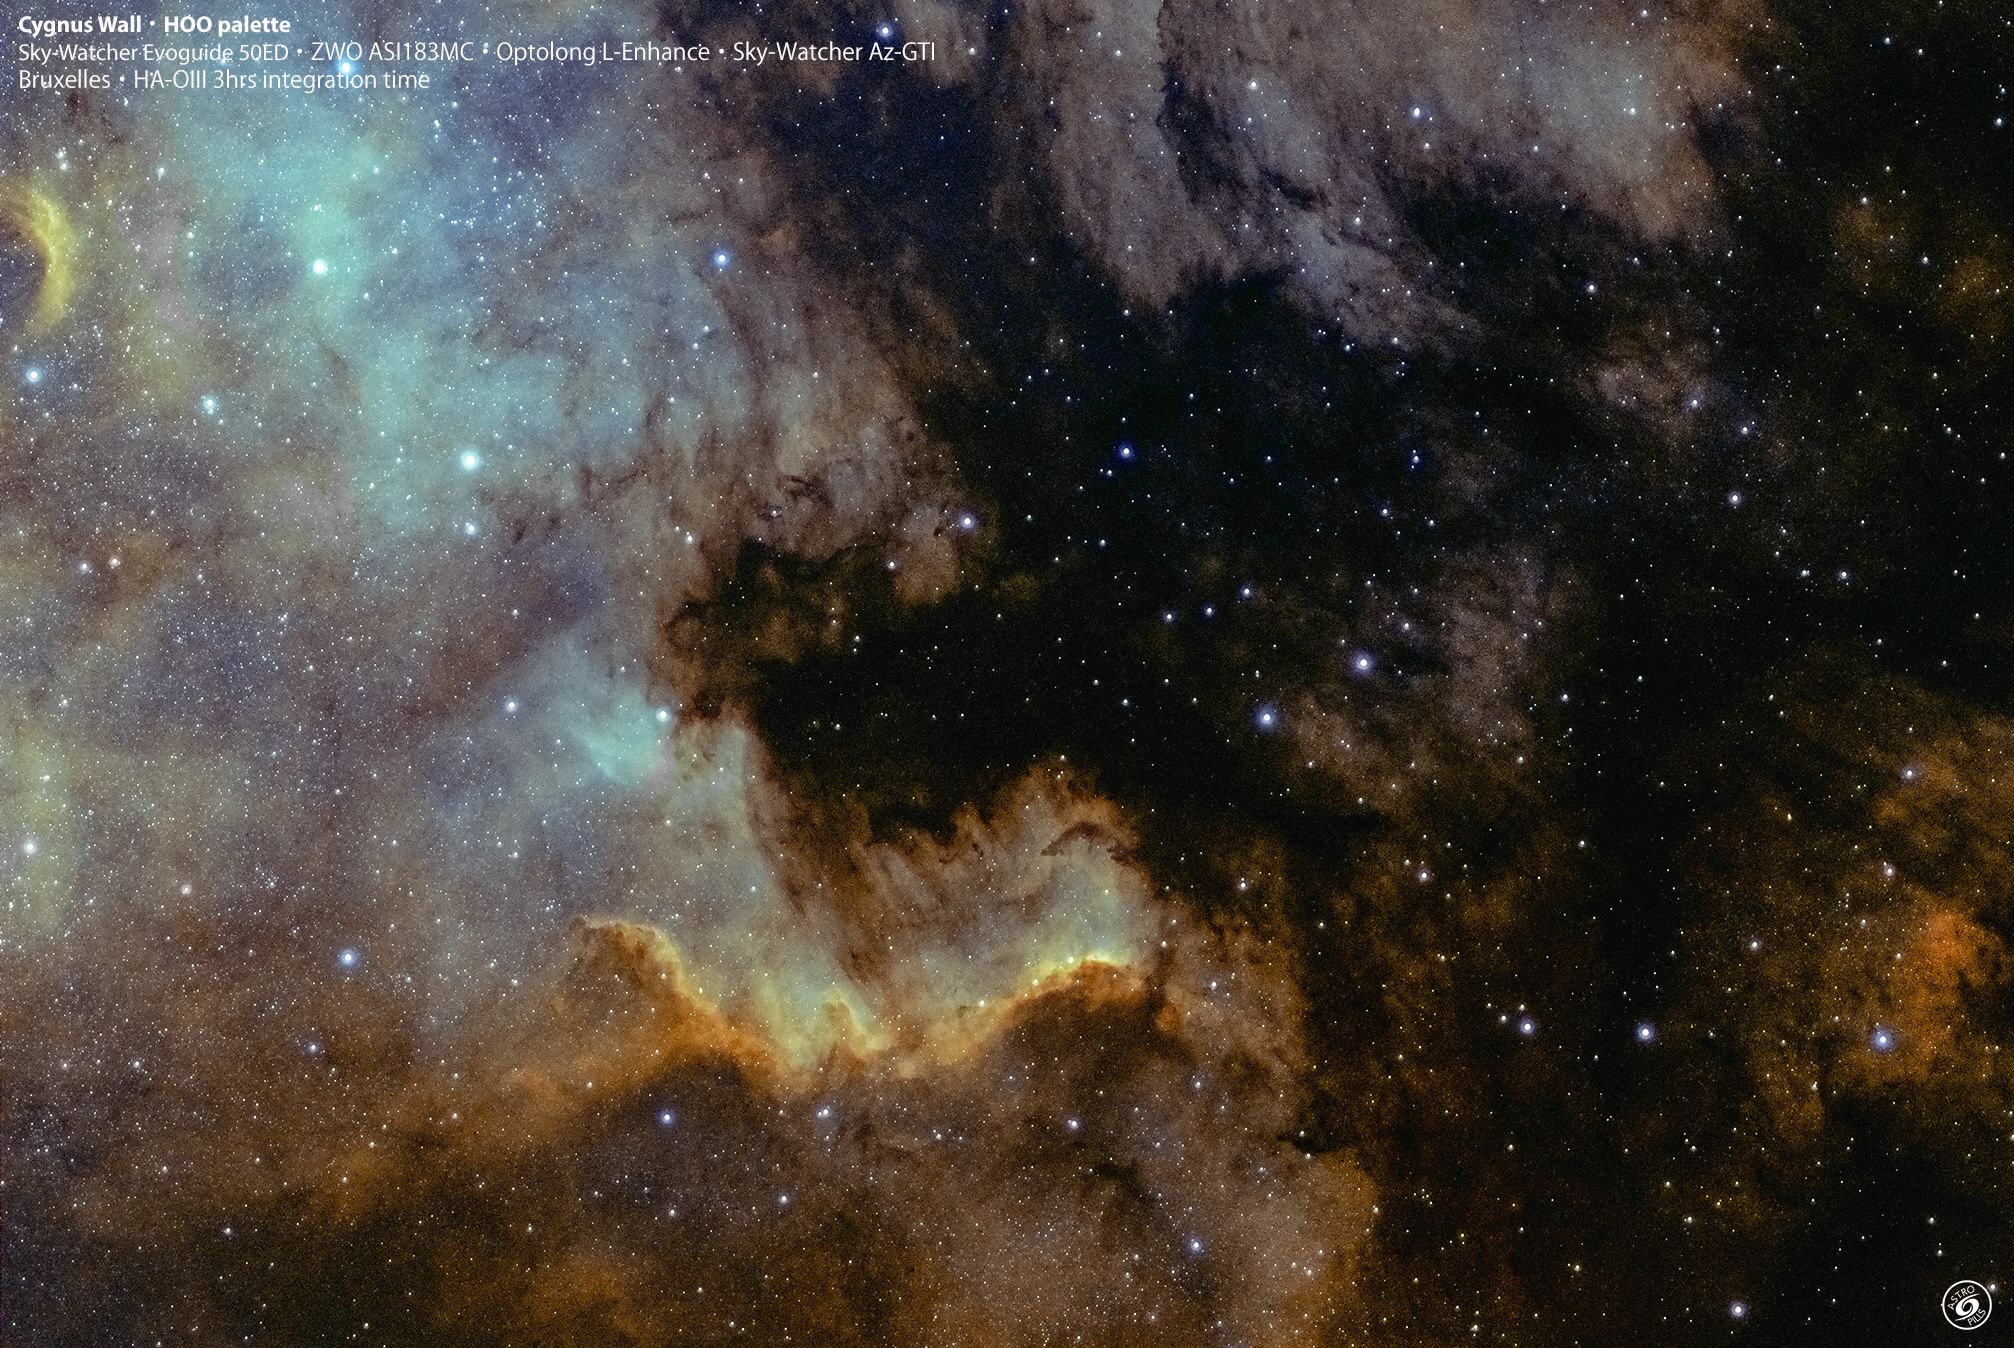
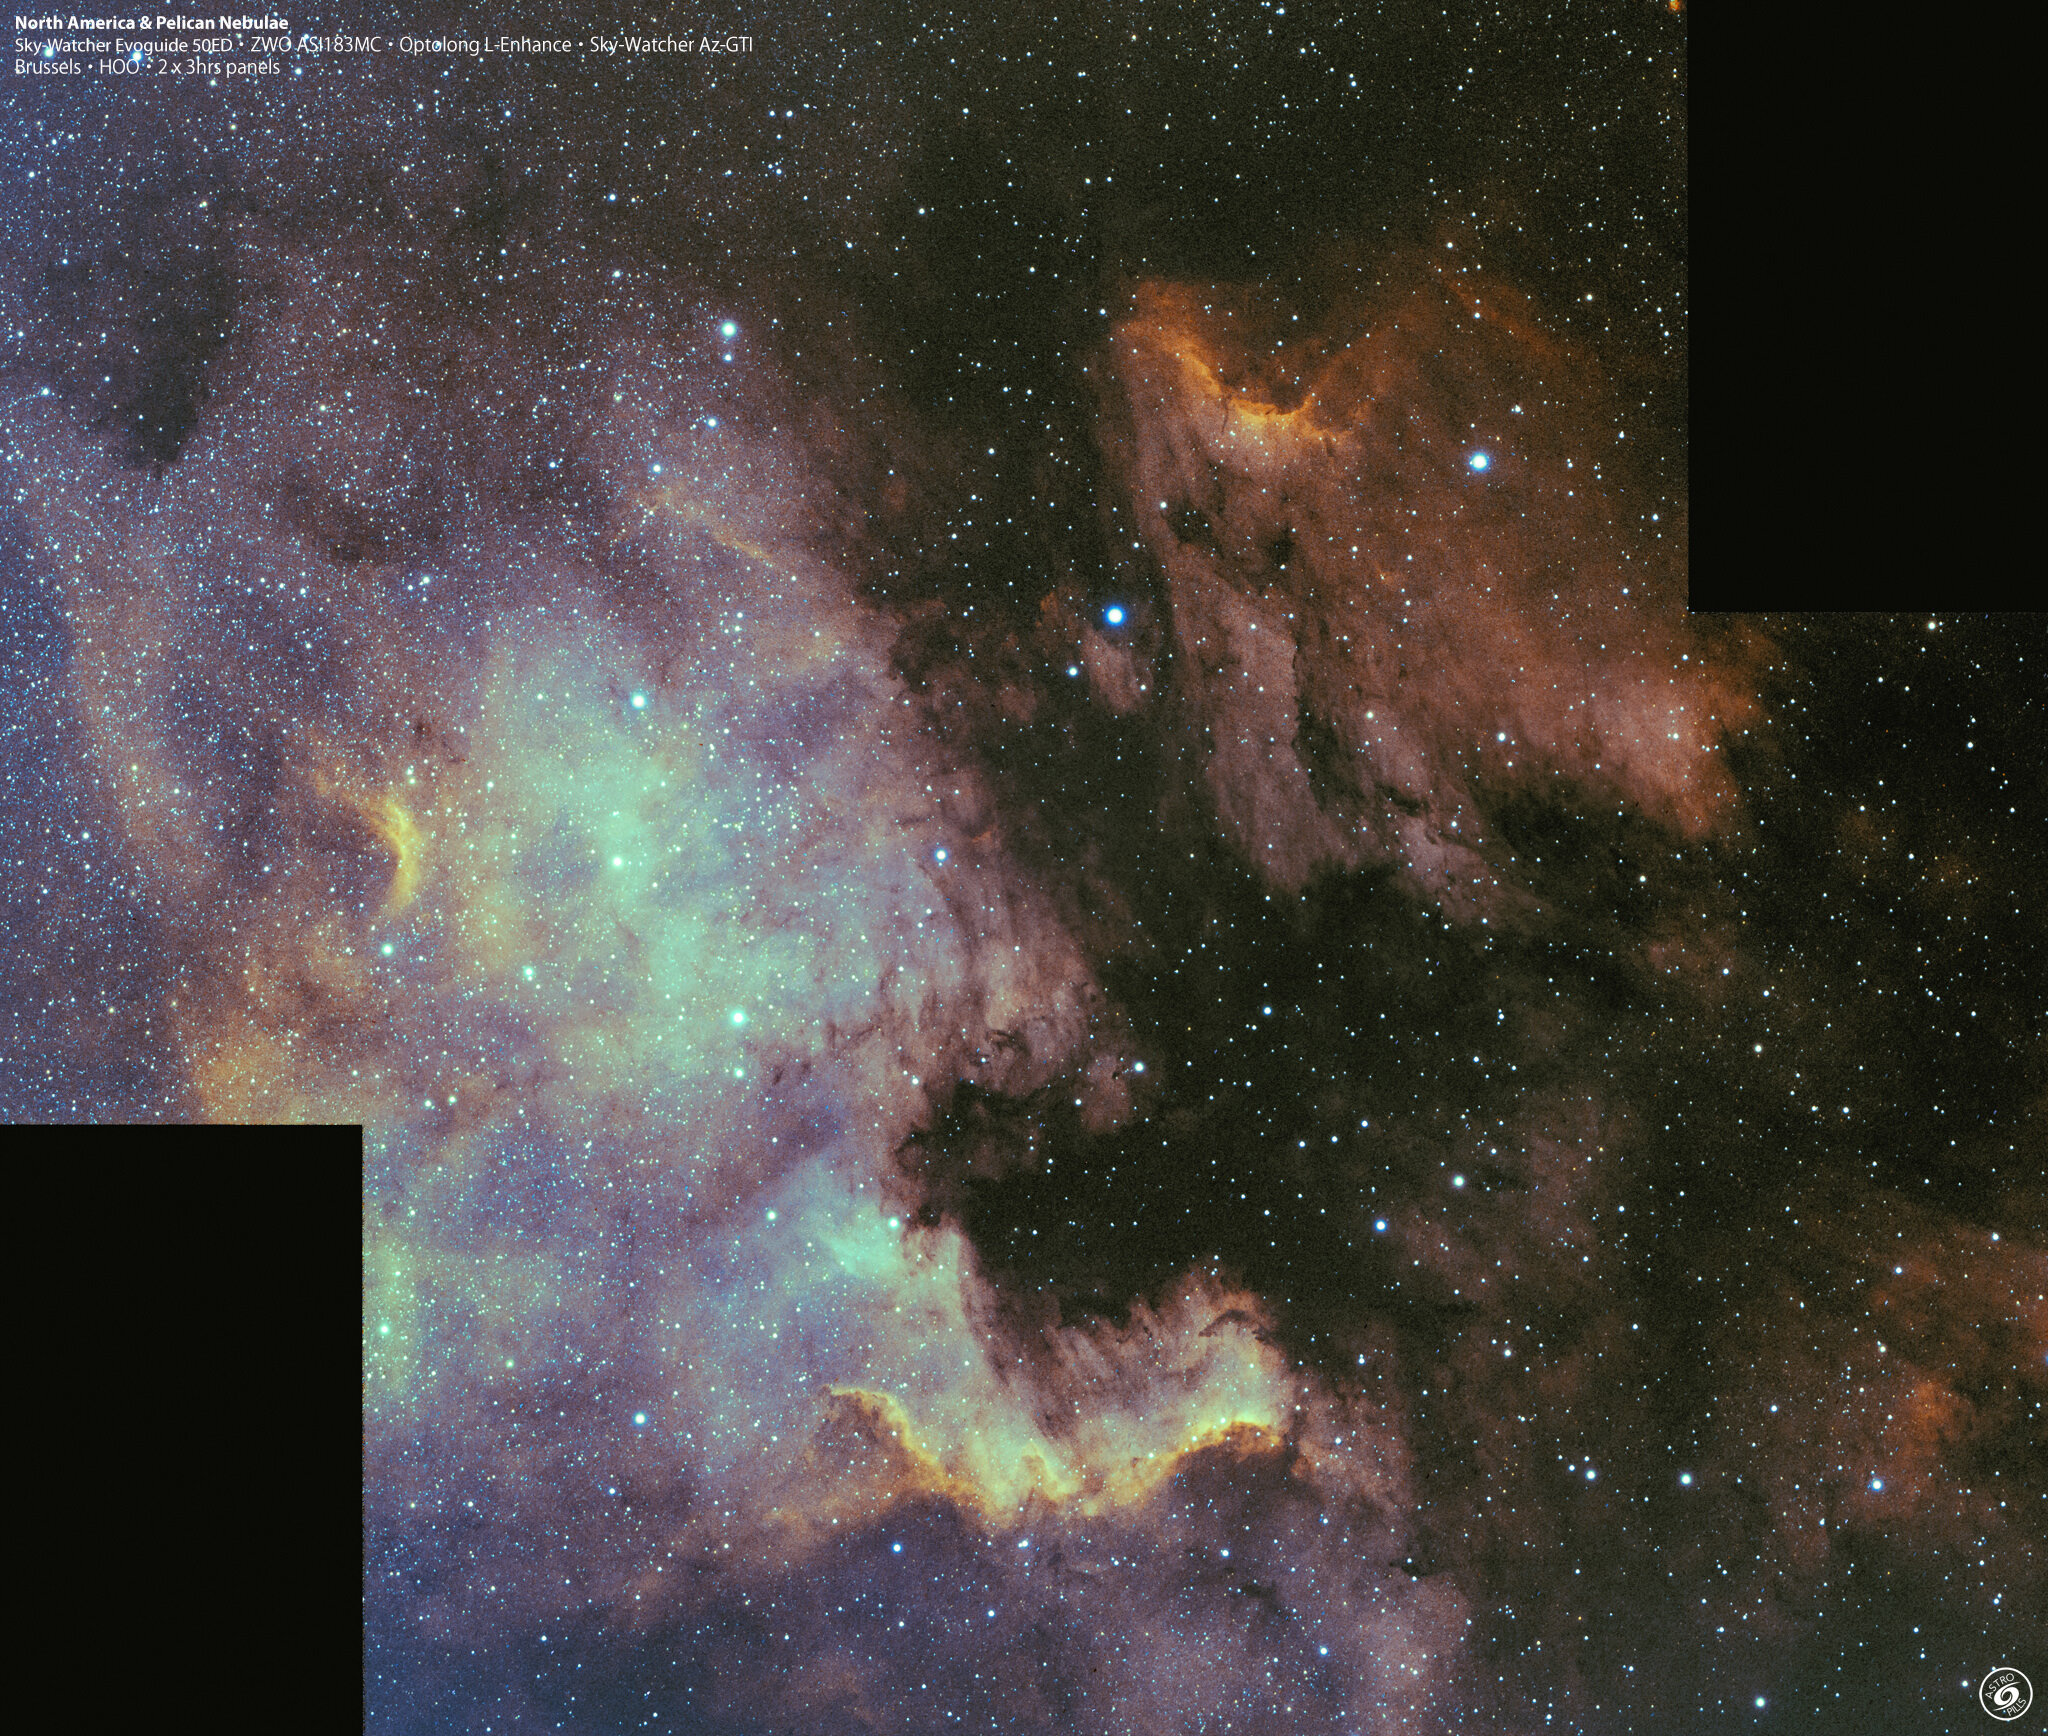
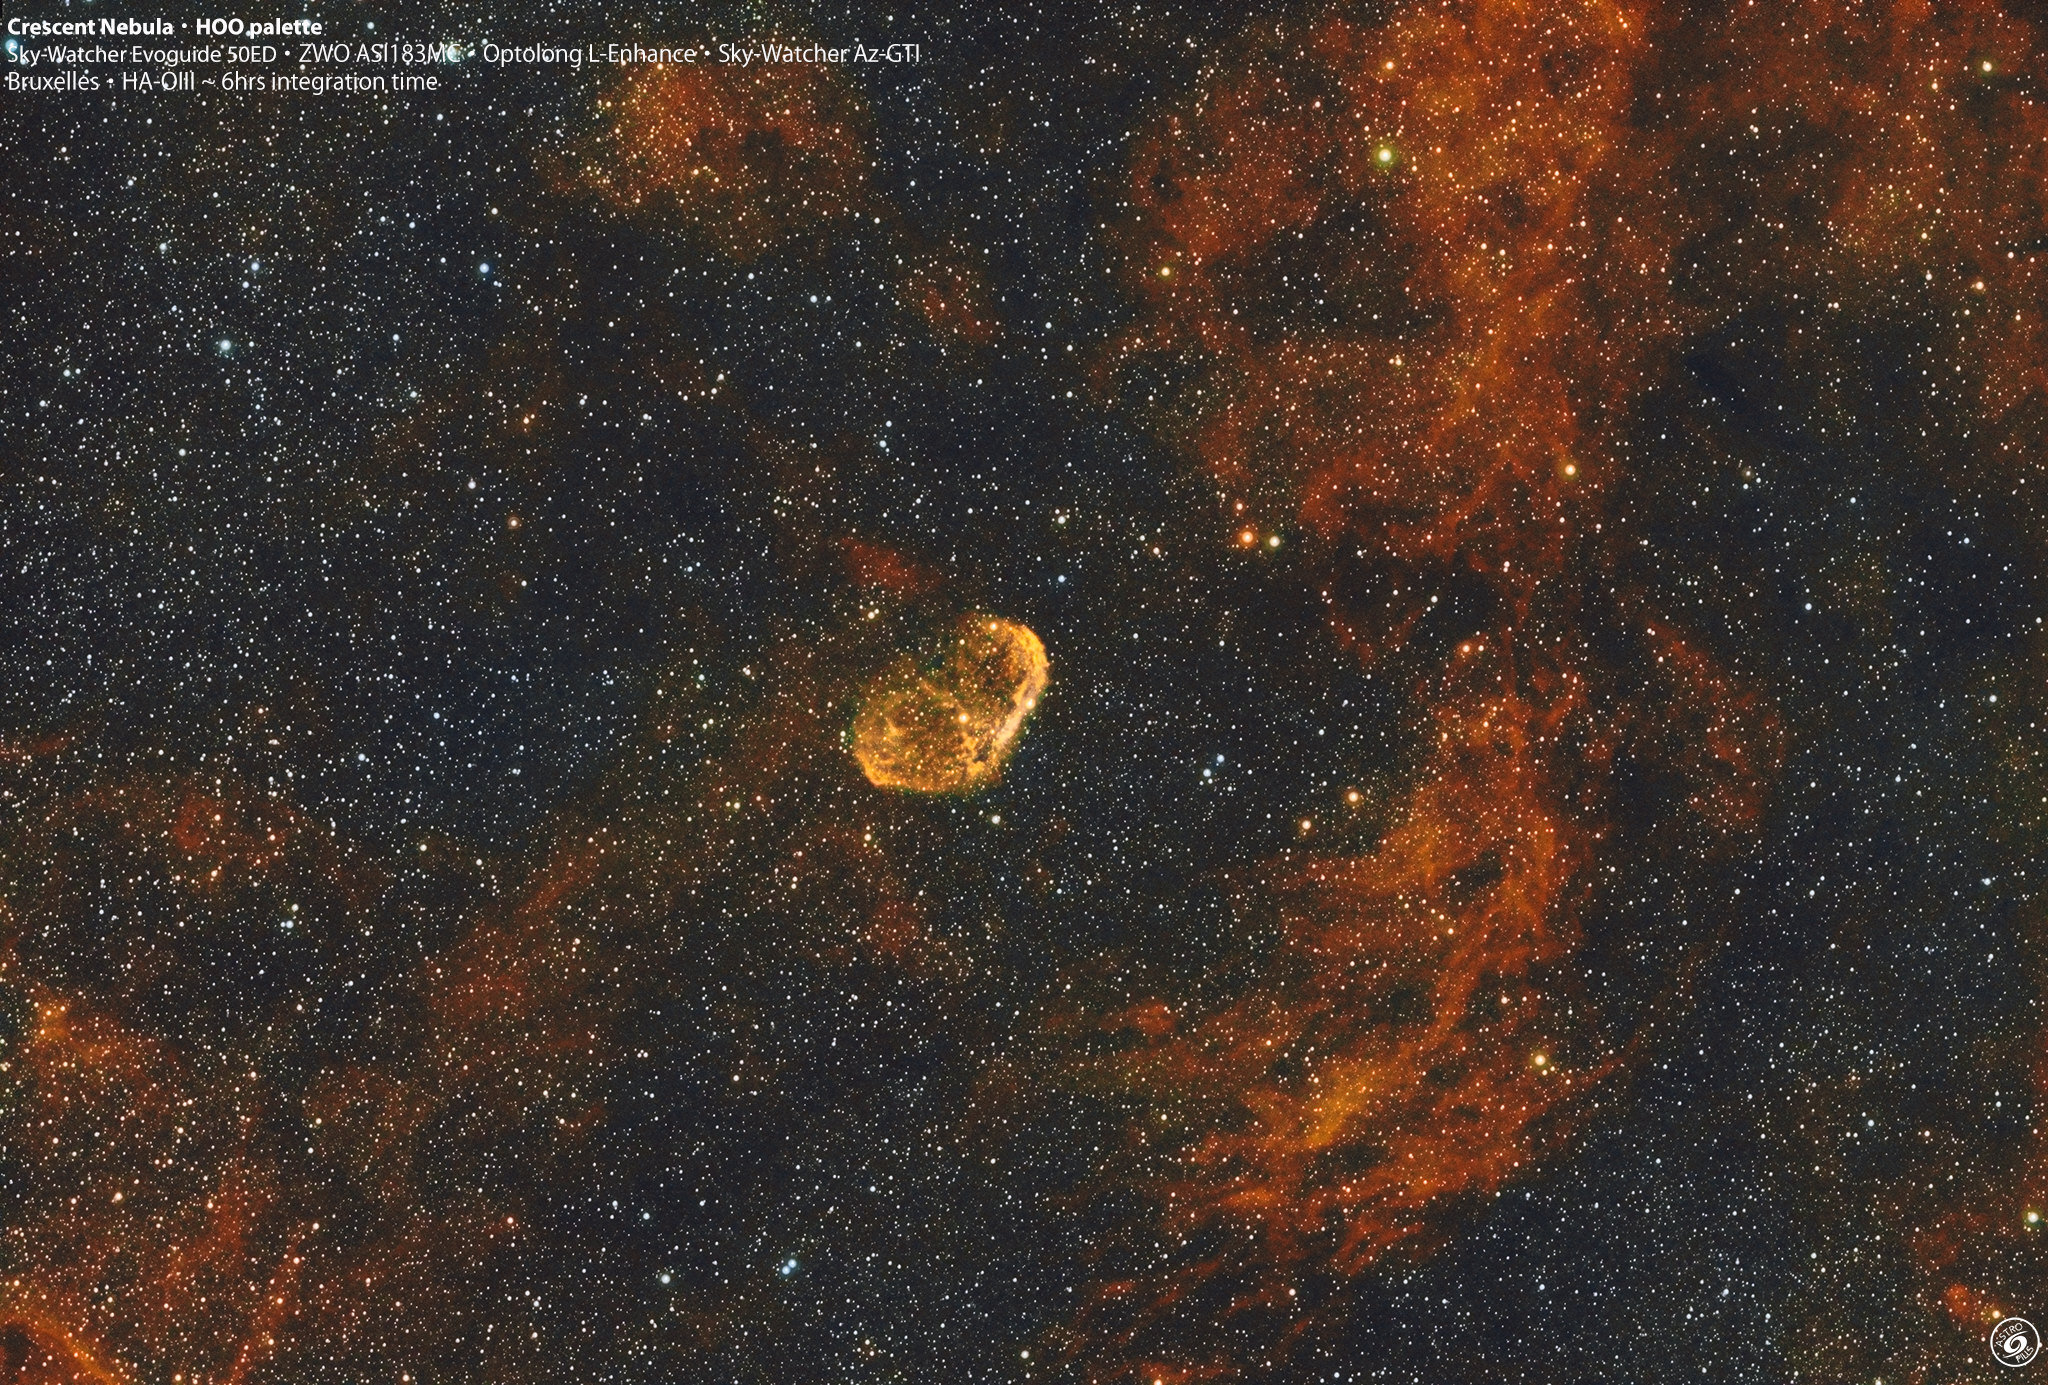
Some Of My Deep Sky Astrophotography With The Az-GTI

Conclusions
If you want to squeeze the most from a compact and lightweight setup, the Sky-Watcher Az-GTI is probably the best choice, as it allows you to grow a fair bit before you will feel the need to upgrade to a larger mount.
And while I think is overall better than the Star Adventurer PRO, here some more food for your thoughts, before deciding if the Az-GTI is for you or not:
The Star Adventurer PRO allows you to spread the budget over a longer period of time, while the Az-GTI will drag you immediately into electronically assisted astrophotography (EAA). This means you will soon shopping for computer software or the ASIAIR, for a guiding camera and guiding scope, for a power tank, etc. On paper, the net difference between getting the Star Adventurer and dressing the Az-GTI as an equatorial mount is only about 130€, but in practice, you may soon find yourself doubling the initial budget to take full advantage of the Az-GTI EAA features;
Because the Az-GTI is highly EAA oriented, I feel I am turning into a sysadmin. If with the Star Adventurer the problems I faced were about astronomy and photography (how to polar align, what does it means, how does it work, how to find the target, etc.), with the Az-GTI is more about connection issues, protocols, cable management, etc. Sometimes, I feel I lost the connection with the sky. Luckily, I still have my Star Adventurer PRO and an even more basic Omegon Minitrack LX2 for when I feel I need to re-connect with the night sky.
Read More On This
Sky-Watcher Az-GTI Hand On Review (external link);
How to create a portable EAA setup for deep sky astrophotography (external link)